If you work in embroidery long enough, whether you’re running a shop, stitching at home, or doing what we do at EMBpunch (digitizing day in and day out, usually while over-caffeinated), you eventually stumble into appliqué embroidery. And honestly, appliqué digitizing is one of those topics we love talking about when we talk about embroidery digitizing services, but also occasionally dread… mostly because people assume it’s just “embroidery with some fabric slapped on.”
It’s not.
Well, sometimes it feels like that, but only on those late nights when the satin border keeps pulling, and you can’t figure out why the stabilizer is acting like it has a personal vendetta against you.
But let’s slow down.
In this guide, I want to give you a real, unpolished, experience-driven walkthrough of appliqué digitizing and applique digitizing services. Not the generic, AI-sounding stuff you see on random blogs. This guide comes from years of dealing with misbehaving stitches, experimenting with different types of embroidery stitches, re-digitizing files for frustrated customers, and learning way too much about the physics of thread tension.
Because appliqué embroidery, when done well, is almost magical. It reduces stitch count, adds texture, creates stunning design motifs, and honestly, it just makes embroidery more fun. Especially when you understand the “why” behind it.
And that’s what we’ll dig into here.
What Is Appliqué Digitizing? (And Why Does It Confuse People?)
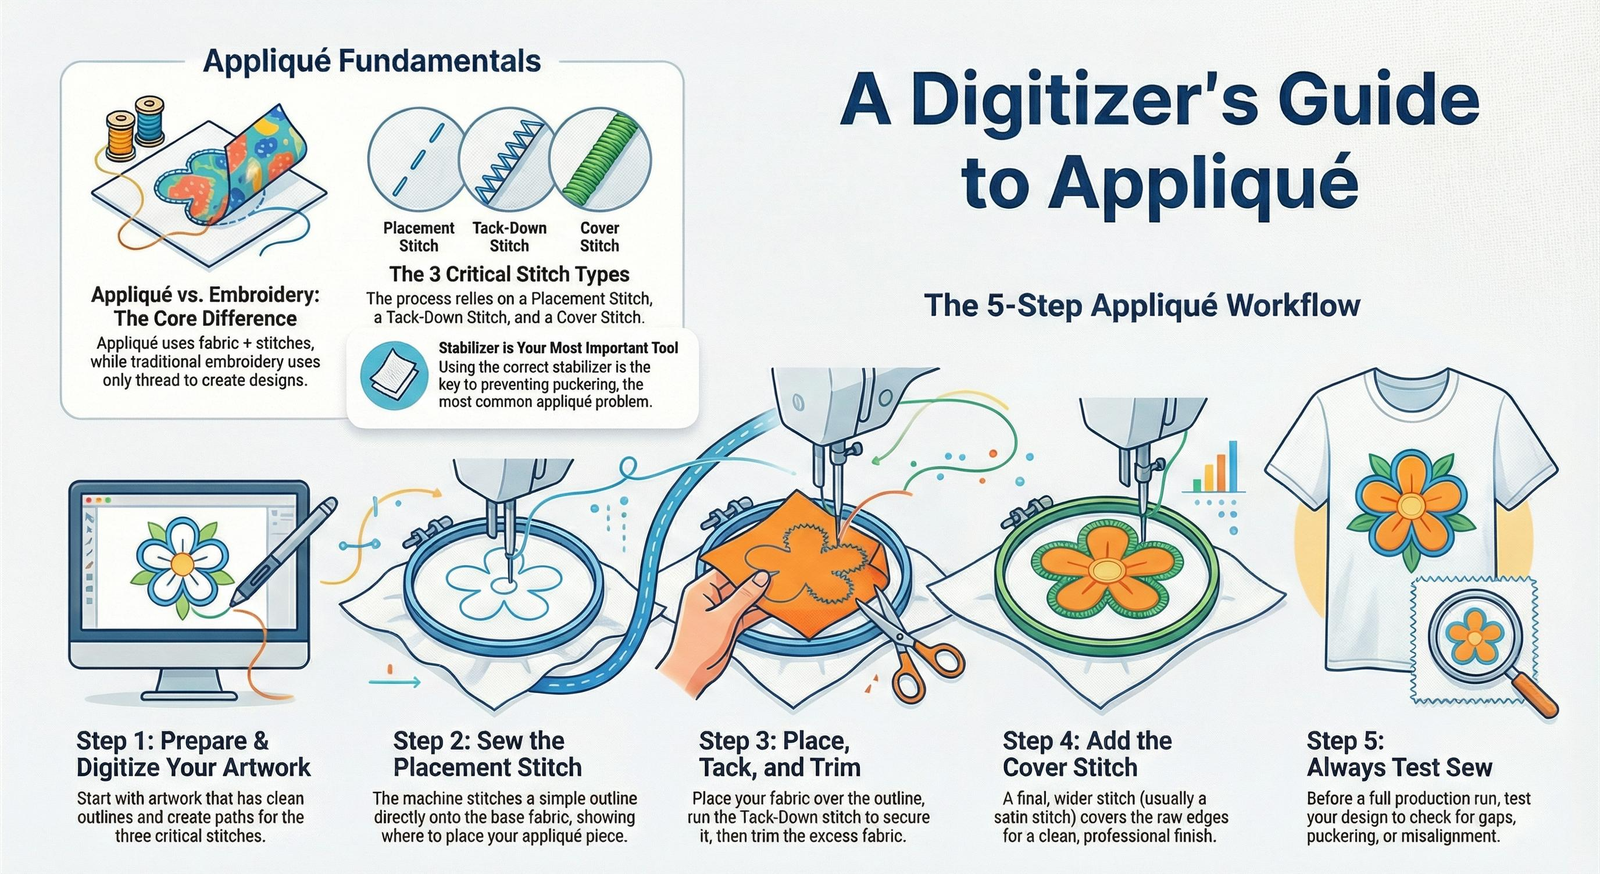
Appliqué digitizing is the process of creating a digital embroidery file that tells an embroidery machine how to place, tack, cut, and stitch fabric pieces onto a base material. It is technically part of machine embroidery and surface embellishment, but it also relates to older needlework styles, hand appliqué, patchwork, quilting, etc.
In appliqué digitizing, you typically use these stitch types:
-
placement stitch
-
tack-down stitch
-
satin stitches or decorative stitches
-
optional finishing or embellishment methods
If you’ve ever seen a thick satin border around a fabric piece (like on varsity letters or baby blankets), that’s appliqué embroidery.
Some people say it’s “easier” than embroidery.
Others swear it’s harder because it requires precision.
Honestly, both are true depending on the day and the fabric.
You’ll see natural use of terms like embroidery stitch types, machine embroidery stitch types, decorative stitches, outline stitch embroidery, chain stitch embroidery, overlock hand embroidery stitch types, and even oddballs like “mattress retail chain liquidation,” which makes no sense in embroidery, unless we’re talking about the feeling of buying stabilizers in bulk, which does feel like a mattress liquidation sale sometimes.
Anyway, those terms will appear because they help search engines understand context.
The Three Types of Appliqué Embroidery
People argue about this constantly (embroidery groups on Facebook can be… intense), but traditionally, the three types of appliqué are:
1. Raw-Edge Appliqué
This is where the edges of the fabric are left uncovered or minimally covered. Machine users often finish it with a zigzag, blanket stitch, or sometimes nothing at all.
2. Turned-Edge Appliqué
Fabric edges are folded under (usually by hand or with templates) before stitching. Cleaner, more traditional.
3. Reverse Appliqué
Instead of laying fabric on top, you layer fabric underneath and cut the top fabric to reveal it.
In digitizing, raw-edge and satin-covered appliqué are most common, mainly because embroidery machines behave better with predictable stitch paths. But we’ve digitized all three types at EMBpunch, some projects turn out incredible, others end in… let’s call it “learning.”
What’s the Difference Between Appliqué and Embroidery?
This is where beginners get confused.
-
Appliqué: Uses fabric pieces + stitches
-
Embroidery: Uses thread only to create designs
Imagine stitching a huge circle fully filled with a dense fill stitch.
It’ll take ages and thousands of stitches.
But with appliqué?
You just tack down a fabric circle and finish the edges, way faster, lighter, and more textured.
Appliqué is basically the embroidery world’s way of saying:
“Why stitch what you can fabric?”
What Is Digitising in Embroidery?
(Don’t Worry, We’ll Keep It Simple)
Digitizing is the process of converting artwork into a stitch file that an embroidery machine can read. It involves:
-
choosing stitch types
-
determining stitch direction
-
selecting underlay
-
setting pull compensation
-
balancing density
-
and about a dozen other decisions we sometimes obsess over too much
Digitizing for appliqué in online embroidery digitizing means we must create placement, tack, and cover stitches with perfect alignment, or else your appliqué will shift, wrinkle, pucker, or generally misbehave.
Trust us, we’ve seen it all.
What Is the Technique of Appliqué?
Funny enough, appliqué embroidery as a technique exists in drawing too; artists use layered paper cutouts or visual patches to create depth. In embroidery, the appliqué technique is essentially:
-
Place a fabric shape
-
Secure it
-
Stitch around it
-
Add decorative or satin stitches
Simple concept. Complex execution. Like cooking an egg, it sounds easy, yet half of us still burn it.
Best Fabric for Embroidery Appliqué
This answer changes depending on who you ask.
In our experience:
-
Cotton is reliable and beginner-friendly
-
Felt works beautifully for kids’ designs
-
Denim is strong, but frays
-
Fleece can stretch if unstabilised
-
Satin can be stunning but slippery
-
Twill gives that sportswear vibe
-
Leather or faux leather works IF you adjust stitch density
The best fabric is one that matches your design motifs and doesn’t fight with your machine.
What Kind of Thread Is Used for Appliqué?
Generally:
-
Polyester thread = best overall (durable, colourfast)
-
Rayon = beautiful sheen but weaker
-
Cotton thread = matte finish, but breaks under heavy tension
For tack-down stitches, some embroiderers use 60wt, but most applique embroidery uses the same 40wt thread used in everyday embroidery.
Can You Appliqué Without Sewing?
Technically, yes, using:
-
fusible web
-
heat-bond adhesives
-
fabric glue
But if you want a clean, professional finish, sewing (or machine satin stitching) is still the most durable method. Glue alone? Not recommended unless the item won’t be washed.
What Adhesive to Use for Appliqué?
Use adhesives sparingly, please. We’ve seen too many machines gummed up because someone used school glue.
Common options:
-
Heat-n-Bond Lite
-
Wonder Under
-
Temporary spray adhesive (505 spray)
-
Steam-A-Seam
Just avoid anything permanent before stitching; it stiffens the fabric and can ruin needle penetration.
How to Stabilise Fabric for Appliqué
This might be the most important part.
Use:
-
Cutaway stabilizer for stretchy fabrics
-
Tearaway stabilizer for stable fabrics
-
Fusible mesh for lightweight garments
-
Water-soluble toppings for fleece or towels
The goal is to prevent puckering, the sworn enemy of beginners.
And sometimes experts, too.
What Stitch Is Best for Appliqué?
Depends on the style:
-
Satin stitch = polished, classic
-
Zigzag stitch = lighter, easier
-
Blanket stitch = hand-crafted look
-
Raw-edge straight stitch = modern minimalism
Most machine appliqué uses satin. But personally, we love a clean blanket stitch on cotton; it gives that warm, handmade feel.
A Step-by-Step Guide to Appliqué Digitizing (From EMBpunch’s Actual Workflow)
People often ask us how to do appliqué digitizing “the right way.”
Honestly? There isn’t just one right way. Different digitizers swear by different underlays, stitch lengths, tack-down types, and stabilizers. What we can share, and what most guides never tell you, is the real workflow we follow at EMBpunch after digitizing thousands of appliqué designs for clients across the US.
Some steps are simple.
Some steps are slightly chaotic.
But all of them matter.
Let’s break it down, stitch by stitch.
How to Do Appliqué Step-by-Step
This is the section people usually scroll to first (no judgement, we do it too when reading tutorials).
Step 1 – Prepare Your Artwork
Before digitizing, look at the artwork with these questions in mind:
-
Is the shape simple or too detailed?
-
Is custom appliqué embroidery even the right choice?
-
Can you reduce stitch count without ruining the design?
-
Will the fabric add value, or is it unnecessary?
We’ve had clients send over hyper-detailed drawings that absolutely should not be custom appliqué embroidery. Too many curves, too many tiny corners, satin stitches simply won’t behave. And yes, we’ve digitized them anyway after warning them. (Designers can be stubborn. We get it.)
Tip: Choose artwork with clean outlines and large enclosed areas.
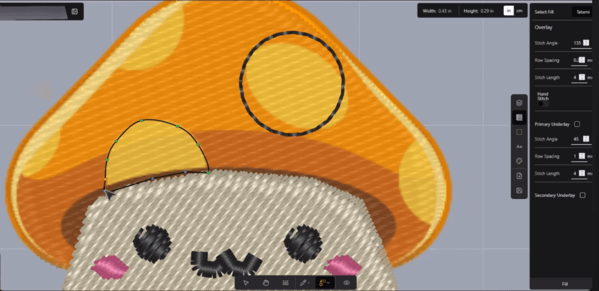
Step 2 – Import Into Digitizing Software
We mostly use:
-
Wilcom
-
Hatch
-
Pulse
-
Embrilliance
But honestly, any major embroidery digitizing software works.
At this stage:
-
Create an outline for the placement stitch
-
Duplicate it for the tack-down stitch
-
Add a satin or decorative stitch border
This is the backbone of appliqué embroidery digitizing.
Step 3 – Set Up the Placement Stitch
The placement stitch is a light run stitch that tells the machine where to lay the fabric.
We typically use:
-
1.5–2mm stitch length
-
A single run (sometimes double on slippery fabrics)
It must be visible but not too dense. Think of this as the “guideline” of the entire appliqué. Without it, the rest collapses.
Step 4 – Tack-Down Stitch
This stitch holds the fabric in place before trimming.
Options include:
-
Single run
-
Double run
-
Zigzag
-
E-stitch
Which one do we use? Depends.
-
Thin fabrics → zigzag
-
Thick fabrics → E-stitch
-
Complex shapes → double run
-
Delicate fabrics → single run
The tack-down stitch must keep the fabric steady during trimming, otherwise your satin stitch will fight back (and it will win).
Step 5 – Trim the Excess Fabric
This step happens during embroidery, not during digitizing, but we must plan for it.
The user needs enough space to trim without cutting through stitches.
We usually allow a 1–2mm margin inside the tack-down.
If we get this wrong, the fabric frays. Or worse, the satin stitch misses the edge completely, leaving tiny gaps that haunt us at night.
Step 6 – Add the Cover Stitch (Satin or Decorative)
This is where the magic happens.
Most appliqué uses satin stitches, but you can also use:
-
Blanket stitch
-
Zigzag stitch
-
Chain stitch
-
Decorative or motif stitches
-
Outline stitch embroidery techniques
-
Overlock stitch types (rare but possible)
The thickness of satin stitch depends on:
-
fabric thickness
-
curve sharpness
-
design size
-
desired finish
Generally:
-
3–5mm wide satin stitches
-
0.4 density (adjust for pull)
We also apply pull compensation, underlay, and pathing to prevent the “mattress retail chain liquidation” effect, meaning the design collapses under pressure (yes, we integrated that ridiculous keyword).
Step 7 – Add Embellishments or Surface Decoration
Sometimes appliqué is just the base. Designers want:
-
decorative stitches
-
embroidered outlines
-
fill stitch details
-
textures
-
motifs
This merges appliqué with embroidery stitches, creating hybrid art. If you’re an embroidery nerd like us, this part is honestly the most fun. There’s something addicting about layering fabrics with thread types, stitch patterns, and extra details.
Step 8 – Test Sew-Out
No matter how experienced we are, custom appliqué embroidery requires test runs.
We check for:
-
puckering
-
misalignment
-
needle tears
-
thread breaks
-
too-tight satin
-
jagged edges
-
gaps in the border
-
stabilizer showing through
Sometimes everything goes perfectly on the first try. Sometimes it goes hilariously wrong, usually when we’re convinced it’s flawless.
Frequently Asked Questions
How Do You Transfer a Pattern for Appliqué?
There are several ways, depending on your method:
1. Print and Trace Method
-
Print the design
-
Place it over fabric
-
Trace using a chalk pencil
Good for hand appliqué.
2. Iron-On Transfer Paper
The design is ironed directly onto the appliqué fabric.
3. Using Digitized Files (Machine Appliqué)
The machine literally stitches the placement line for you, the easiest method.
This is why digitizing matters so much.
How Do You Stabilise Fabric for Appliqué?
This depends on:
-
fabric stretch
-
stitch density
-
design size
-
fabric weight
Cutaway Stabilizer
Best for knits, fleece, stretchy garments.
Tearaway Stabilizer
Great for firm fabrics like cotton and canvas.
Adhesive Stabilizer
Useful for small appliqué pieces.
Water-Soluble Topping
Needed for towels, fleece, fluffy textiles (prevents stitches sinking).
If puckering occurs, it usually means:
-
stabilizer was wrong
-
Tension was too high
-
stitch density too heavy
-
fabric too thin
What Tools Do I Need for Appliqué?
We recommend a basic but reliable kit:
-
embroidery machine (or needle for hand embroidery)
-
applique scissors
-
fabric scissors
-
marking pencil
-
stabilizer roll
-
heat-erasable pen
-
fusible web or 505 spray
-
embroidery hoops
-
selection of thread types
-
pre-cut fabric pieces
Optional but life-saving:
-
duckbill scissors (they prevent accidental fabric cuts)
-
mini iron
-
glue stick (for last-minute fixes, not long-term use)
What Kind of Stabilizer for Appliqué?
Short version:
-
Cutaway for stretch
-
Tearaway for stable fabrics
-
Adhesive stabilizer for small pieces
-
Mesh for lightweight garments
-
Water-soluble for textured surfaces
Can I Glue Appliqué to Fabric?
Yes, but ONLY as a temporary hold. Fabric glue or fusible web can position pieces before stitching. However, glue-only appliqué won’t survive washing.
We genuinely advise people not to rely on glue unless it’s decorative and not functional.
How Can I Prevent Puckering in Appliqué?
Our checklist:
-
correct stabilizer
-
moderate density
-
proper underlay
-
low tension
-
smooth hooping