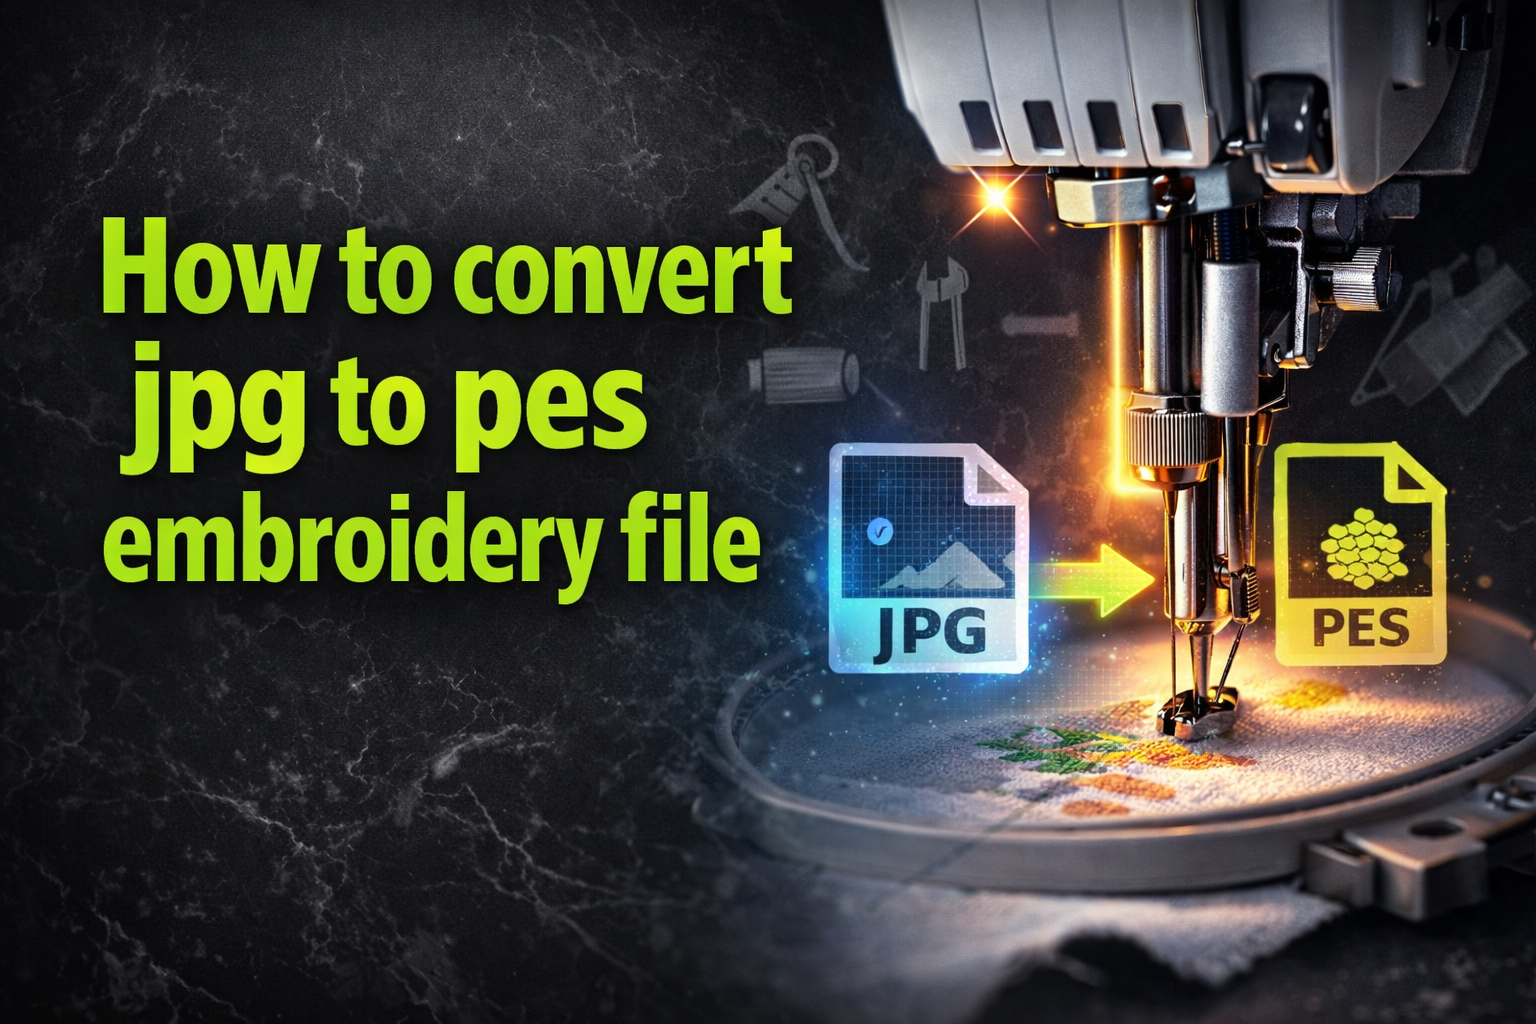
How to convert jpg to pes? How to convert to pes file? Are you looking for the solutions to these questions and looking to transform your favorite JPEG image into a stunning embroidered design? Well, you've come to the right place! Converting a JPG file to a PES embroidery file may seem like a daunting task, but with the right tools and guidance, it can be a breeze. In this article, we will walk you through the steps to convert your JPG image into a PES embroidery file, allowing you to bring your digital designs to life on fabric.
Whether you're a seasoned embroidery enthusiast or someone exploring embroidery for the first time, understanding how this conversion works is essential. Many people today rely on online embroidery digitizing services or professional software to achieve clean and machine-ready embroidery files. We’ll discuss different methods, online tools, and software options that can help you accomplish this task without compromising design quality. So, let's dive in and unravel the secrets of convert jpg to embroidery file online!
Understanding the embroidery file format
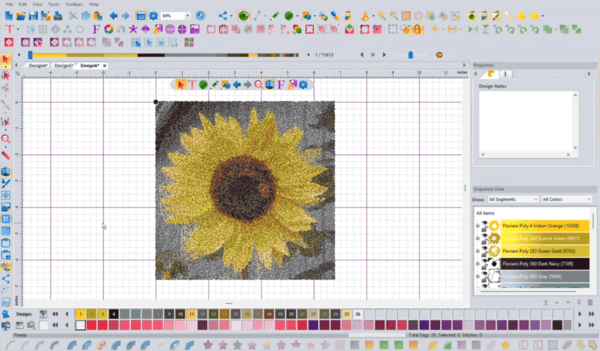
Embroidery is a versatile art form that has been around for centuries, and it continues to captivate people worldwide. One of the key components of embroidery is the file format used to store the stitching patterns. In the digital age, the PES (Portable Embroidery Stitch) file format has become a widely recognized and widely used standard for embroidery designs. Professional embroidery digitizing services convert artwork into stitch-based files so machines can interpret them accurately. This conversion ensures clean outlines, smooth fills, and proper thread layering, all of which are crucial for high-quality embroidery.
Need a Professional Embroidery File?
If you want clean, production-ready embroidery files, Embpunch provides professional embroidery digitizing services for logos, caps, patches, jackets, polos, and more.
The process to convert JPG to pes file format is specifically designed to store the necessary information for embroidery machines to accurately reproduce the desired design. This file format contains detailed instructions on the placement, type, and sequence of stitches, as well as the color changes required to create the final embroidered image. Unlike the ubiquitous JPEG (Joint Photographic Experts Group) format, which is primarily used for digital images, the image to pes format is tailored for the unique requirements of embroidery machines.
Secondly, PES files allow better control over stitch quality, thread usage, and design durability. This is especially important when working with detailed logos or commercial embroidery projects. Many businesses rely on online embroidery digitizing providers to ensure their designs stitch out cleanly and professionally.
One of the key advantages of the PES format is its ability to preserve the integrity of the design during the embroidery process. The file format ensures that the stitches are placed precisely, the colors are accurately represented, and the overall design is faithfully reproduced on the fabric. This level of precision is essential for creating high-quality embroidered products, whether it's clothing, accessories, or home decor.
Important:
Understanding the differences between the JPEG and PES file formats is crucial when it comes to converting your digital images into embroidery designs. While JPEG files are primarily used for storing and sharing digital photographs, they lack the specific instructions required for embroidery machines to accurately reproduce the design. This is where the process of converting a JPEG image into a PES embroidery file becomes essential.
|
Product or Service Name |
Type |
Key Features |
Platform Compatibility |
Level of Customization |
Target User |
|
|---|---|---|---|---|---|---|
|
Premium embroidery digitizing services |
Manual digitizing service |
Manual digitization, stitch optimization, color adjustment, and superior stitch quality for commercial results |
Web-based (Professional service) |
Professional Grade |
Businesses, commercial, or branding projects |
|
|
Brother PE-Design |
Dedicated software |
Built-in conversion tools, advanced editing, and customization features |
Desktop |
High |
Embroidery enthusiasts and professionals |
|
|
Wilcom EmbroideryStudio |
Dedicated software |
Built-in conversion tools, professional editing, and customization features |
Desktop |
High |
Professionals and seasoned enthusiasts |
|
|
Embrilliance Essentials |
Dedicated software |
Built-in conversion tools with a wide range of editing and customization features |
Desktop |
High |
Embroidery enthusiasts |
|
|
Brother PE-Design mobile app |
Mobile app |
Mobile-friendly JPEG to PES conversion and editing features |
Mobile |
Moderate |
Mobile users |
|
|
Embrilliance Essentials app |
Mobile app |
Mobile-friendly JPEG to PES conversion and editing features |
Mobile |
Moderate |
Mobile users |
|
|
Adobe Photoshop |
Image editing software |
General image editing with the ability to convert files to PES format |
Desktop |
Moderate |
Users familiar with the software |
|
|
GIMP |
Image editing software |
General image editing with the ability to convert files to PES format |
Desktop |
Moderate |
Users familiar with the software |
|
|
DesignBundles.net's conversion tool |
Online conversion tool |
Streamlined JPEG to PES conversion process |
Web-based |
Limited |
Users looking for accessibility or free solutions |
|
|
Embroider.com's JPG to PES converter |
Online conversion tool |
Streamlined JPEG to PES conversion process |
Web-based |
Limited |
Users looking for accessibility or free solutions |
|
|
Embrilliance's online conversion service |
Online conversion tool |
Streamlined JPEG to PES conversion process |
Web-based |
Limited |
Users looking for accessibility or free solutions |
|
Why Convert Jpg to Pes for Embroidery
Converting a JPEG image into a PES embroidery file is a crucial step for anyone looking to bring their digital designs to life through the art of embroidery. There are several compelling reasons why this conversion process is essential:
Firstly, embroidery machines are designed to work with specific file formats, and PES is one of the most widely recognized and supported formats. By converting your JPEG image into a PES file, you ensure that the embroidery machine can accurately interpret the design and reproduce it on the fabric. This ensures that the final embroidered product matches your original digital vision.
Secondly, the PES file format contains essential information that is not present in a JPEG image, such as the precise placement of stitches, the sequence of color changes, and the specific thread types required. This level of detail is crucial for creating high-quality embroidered designs that are both visually stunning and structurally sound.
Furthermore, converting a JPEG image to a PES file allows you to take advantage of the various editing and customization features offered by embroidery software. These tools enable you to adjust the size, orientation, and even the stitching patterns of the design, ensuring that it fits perfectly on the desired fabric or garment. This level of control is essential for creating truly unique and personalized embroidered products.
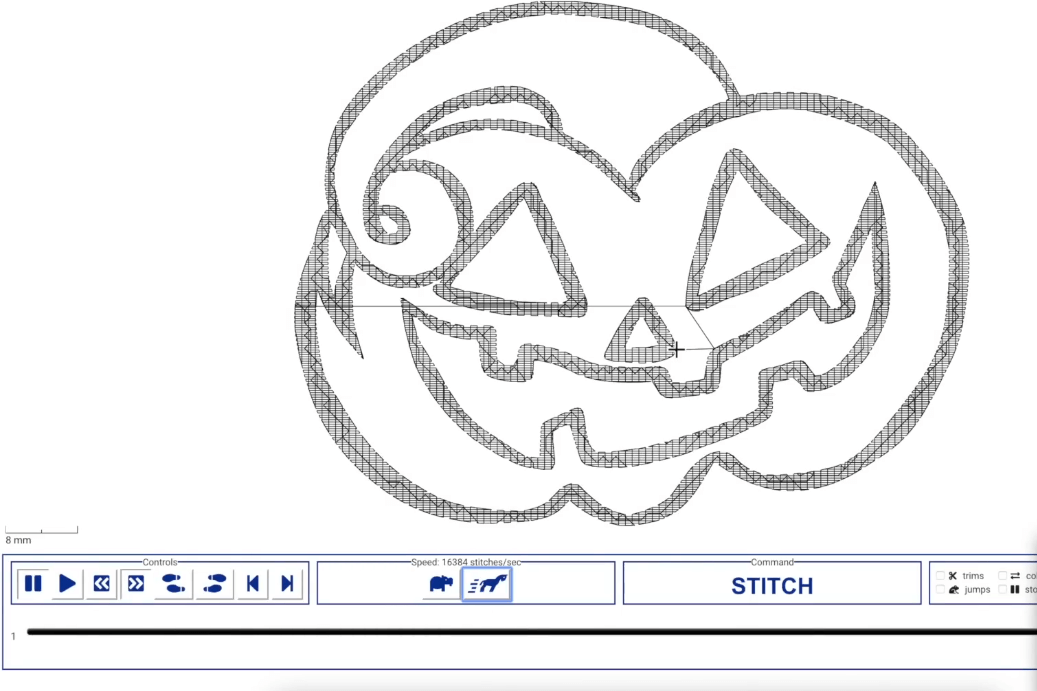
The process of converting jpg to pes
Converting a JPEG image into a PES embroidery file is a straightforward process that can be accomplished using a variety of tools and software.
Next, choose the right conversion method. You can either use embroidery software or premium embroidery digitizing services that manually digitise your artwork for better results.
The specific steps may vary depending on the software or online service you choose, but the general process typically involves the following steps:
- Prepare your JPEG image: Begin by ensuring that your JPEG image is of high quality, with clear lines, distinct colors, and a suitable resolution for embroidery. Avoid images with complex backgrounds or intricate details, as these can be challenging to convert effectively.
- Choose your conversion tool: There are several options available for converting a JPEG image to a PES file, including dedicated embroidery software, online conversion tools, and even some image editing programs. Research the available options and select the one that best suits your needs and skill level.
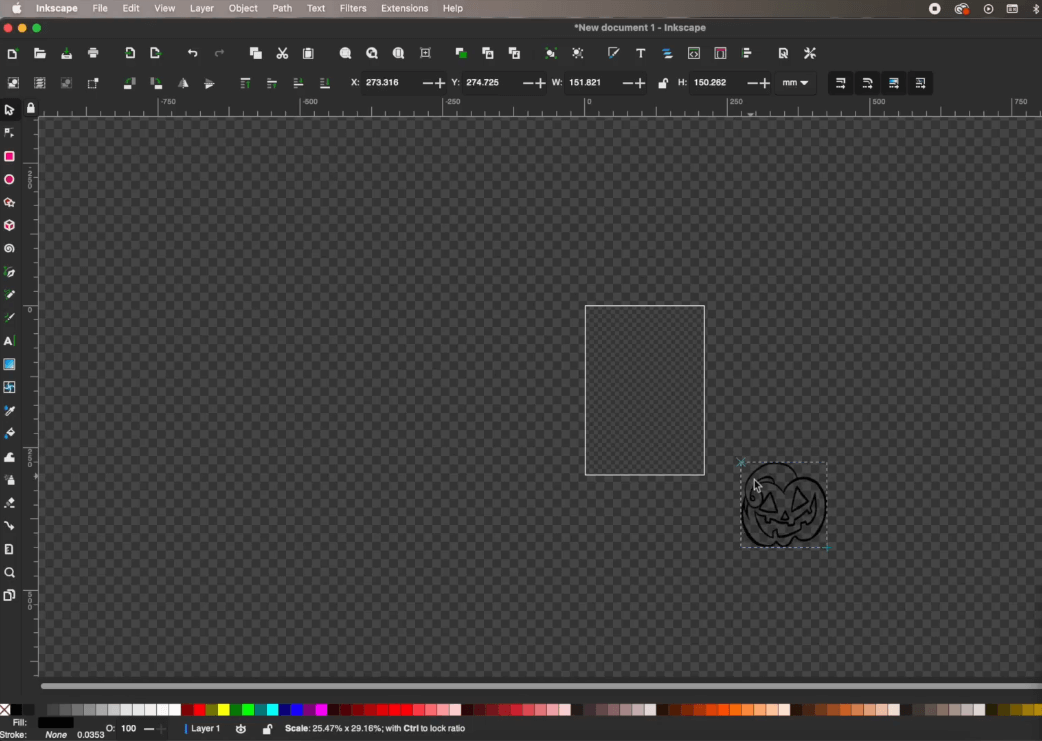
- Import the JPEG image: Once you have selected your conversion tool, proceed to import the JPEG image into the software or online platform. This step may involve navigating through menus, browsing your local file system, or simply dragging and dropping the image into the designated area.
- Adjust the settings: Many conversion tools offer various settings and options that allow you to customize the conversion process. This may include adjusting the size of the design, selecting the appropriate thread colors, and even fine-tuning the stitching patterns. Take the time to explore these settings to ensure that the final PES file meets your expectations.
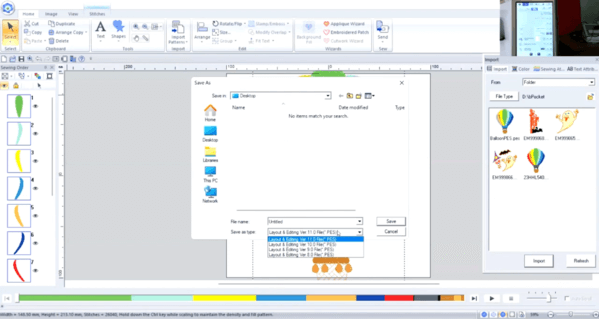
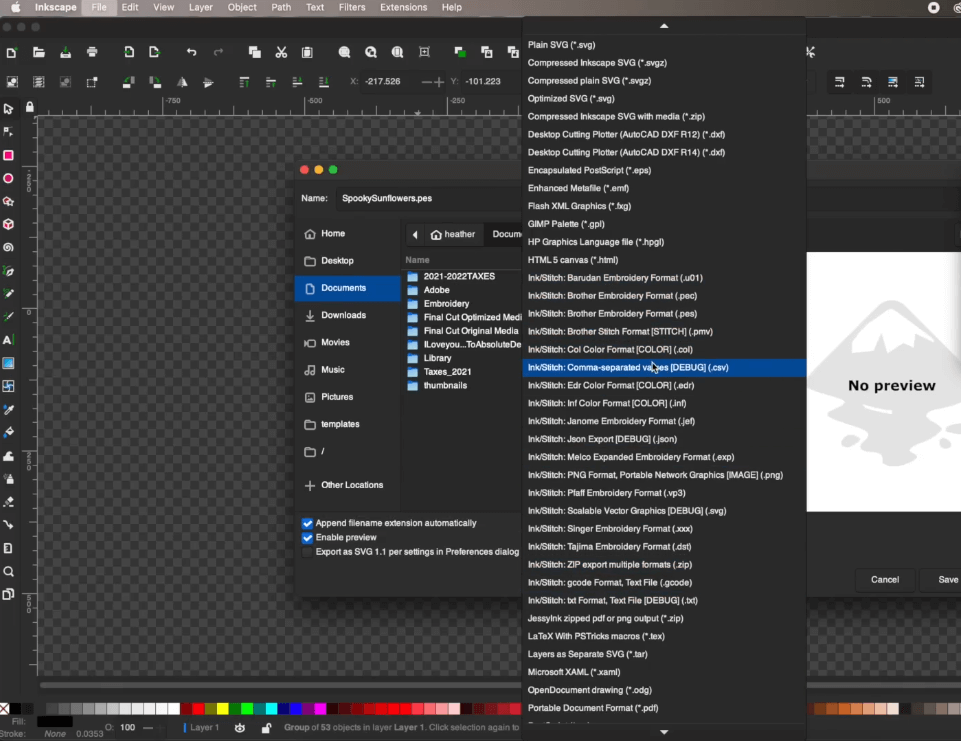
- Generate the PES file: After making any necessary adjustments, initiate the conversion process. Depending on the tool you are using, this may involve clicking a "Convert" or "Generate PES" button, or following a specific set of instructions provided by the software or online service.
- Save and export the PES file: Once the conversion is complete, save the resulting PES file to your local storage or cloud-based platform. This will allow you to easily access and use the embroidery design for your projects.
By following these steps, you can efficiently convert your JPEG images into PES embroidery files, paving the way for you to bring your digital designs to life through the art of embroidery.
Tools and software for converting jpg to pes
When it comes to converting a JPEG image into a PES embroidery file, there are several tools and software options available, each with its own unique features and capabilities. Here are some of the most popular and effective options:
- Embroidery software: Many dedicated embroidery software programs, such as Brother PE-Design, Wilcom EmbroideryStudio, and Embrilliance Essentials, offer built-in tools for converting JPEG images into PES files. These software solutions often provide a wide range of editing and customization features, allowing you to refine the design before generating the final PES file.
- Online conversion tools: If you prefer a more streamlined and accessible approach, there are several online tools that specialize in converting JPEG images to PES files. Examples include DesignBundles.net's conversion tool, Embroider.com's JPG to PES converter, and Embrilliance's online conversion service. These web-based tools are typically free or low-cost and can be accessed from any device with an internet connection.
- Image editing software: Some popular image editing programs, such as Adobe Photoshop and GIMP, also offer the ability to convert JPEG images to PES files. While these tools may not be as specialized as dedicated embroidery software, they can still be a viable option for those already familiar with the software and its capabilities.
- Conversion apps: For users who prefer a more mobile-friendly solution, there are several apps available for converting JPEG images to PES files. Examples include the Brother PE-Design mobile app, the Embrilliance Essentials app, and various third-party conversion apps available on app stores. Professional embroidery digitizing services that manually digitise designs for superior stitch quality
Quick Note:
When selecting a tool or software for converting your JPEG images to PES files, consider factors such as ease of use, the range of customization options, compatibility with your embroidery machine, and the overall cost. Additionally, look for tools that offer features like color adjustment, stitch optimization, and the ability to preview the final design before generating the PES file.
Regardless of the specific tool or software you choose, the key is to find a solution that aligns with your skill level, embroidery needs, and overall workflow. By leveraging the right conversion tools, you can seamlessly transform your JPEG images into high-quality PES embroidery files.
Tips for successful conversion

Converting a JPEG image into a PES embroidery file can be a straightforward process, but there are a few tips and best practices to keep in mind to ensure a successful and satisfactory outcome:
- Start with a high-quality JPEG image: The quality of your input image will directly impact the quality of the final PES file. Aim to use a JPEG image with a high resolution, clear lines, and distinct colors. Avoid images with complex backgrounds or intricate details, as these can be challenging to convert effectively.
- Optimize the image for embroidery: Before converting the JPEG to a PES file, consider simplifying the design by reducing the number of colors, smoothing out the edges, and removing any unnecessary details. This can help ensure that the final embroidered design looks clean and visually appealing.
- Adjust the size and orientation: When converting the JPEG to a PES file, pay close attention to the size and orientation of the design. Ensure that the final PES file is the appropriate size for your embroidery project and that the design is properly aligned.
- Choose the right thread colors: Many conversion tools will allow you to select the specific thread colors to be used in the embroidery process. Take the time to choose colors that complement the original JPEG image and work well with the fabric or garment you plan to embroider.
- Preview the design before finalizing: Most conversion tools offer the ability to preview the PES file before generating the final version. Take advantage of this feature to ensure that the stitching patterns, color placements, and overall design meet your expectations.
- Test the PES file on a small scale: Before committing to a full-scale embroidery project, consider testing the PES file on a small piece of fabric or a sample garment. This will allow you to identify any potential issues or adjustments that may be needed before moving forward with the larger project.
- Backup your PES files: As with any digital file, it's essential to backup your PES files to ensure that you can easily access and use them for future projects. Consider storing the files on a local hard drive, cloud storage platform, or external storage device.
By following these tips, you can maximize the chances of a successful JPEG to PES conversion, resulting in high-quality embroidered designs that bring your digital creations to life. If you’re working on commercial or branding projects, relying on expert online embroidery digitizing services can save time and prevent costly mistakes.
Common challenges and troubleshooting
While converting a JPEG image to a PES embroidery file is generally a straightforward process, there are a few common challenges that you may encounter along the way. Here are some of the most common issues and tips for troubleshooting them:
- Poor image quality: If the JPEG image you're trying to convert is of low quality, with blurry lines, pixelated details, or inconsistent colors, the resulting PES file may not be suitable for high-quality embroidery. In such cases, consider starting with a higher-resolution JPEG image or using image editing software to improve the quality before attempting the conversion.
- Complex designs: Intricate designs with a large number of colors, intricate details, or complex backgrounds can be challenging to convert effectively. These types of designs may require more advanced conversion tools or software, as well as additional editing and optimization to simplify the design for embroidery.
- Incorrect sizing or positioning: If the final PES file is not the correct size or is not properly aligned on the fabric, it can lead to issues during the embroidery process. Carefully review the size and orientation settings during the conversion process to ensure the PES file is ready for your specific embroidery project.
- Thread color mismatches: Sometimes, the thread colors in the PES file may not match the colors in the original JPEG image. This can happen if the conversion tool or software doesn't have access to the exact thread colors you need. In such cases, you may need to manually adjust the thread color selections or use a more advanced conversion tool that offers better color matching capabilities.
- Stitch quality issues: If the stitching patterns in the PES file appear uneven, loose, or otherwise problematic, it could be due to the conversion process or the limitations of the embroidery machine. Try testing the PES file on a small sample before committing to a larger project, and consider adjusting the stitch settings or using a different conversion tool if necessary.
Quick Note:
To troubleshoot these and other challenges, it's essential to carefully review the PES file after conversion, test it on a small scale, and be willing to experiment with different conversion tools or software until you find the one that works best for your specific needs and embroidery setup.
Additionally, seeking guidance from online forums, tutorials, or customer support from the software or tool providers can be invaluable in resolving any issues you may encounter during the JPEG to PES conversion process.
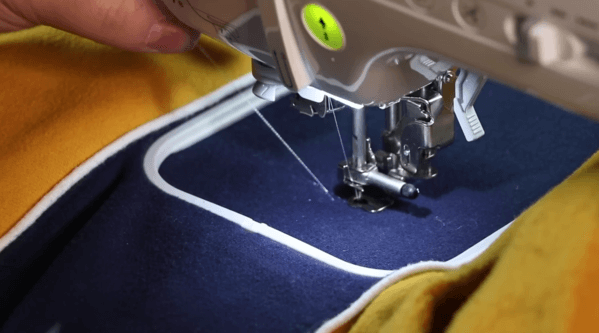
Using the converted pes file for embroidery
Once you've successfully converted your JPEG image into a PES embroidery file, the next step is to use that file to create your desired embroidered project. Here's a general overview of how to use the converted PES file for embroidery:
- Load the PES file into your embroidery machine: Depending on the type of embroidery machine you have, you'll need to load the PES file into the machine's memory or software. This process may involve connecting your machine to a computer, inserting a USB drive, or using the machine's built-in file management system.
- Hoop the fabric: Prepare your fabric by securing it in an embroidery hoop. This will ensure that the fabric remains taut and stable during the embroidery process, allowing the design to be stitched accurately.
- Adjust the design settings: Review the design settings in your embroidery machine or software, such as the size, position, and thread colors. Make any necessary adjustments to ensure the design fits your project and uses the appropriate thread colors.
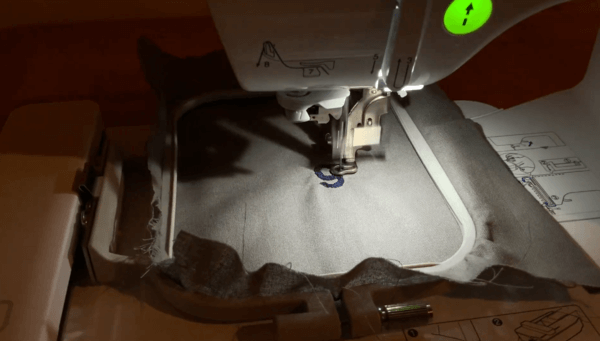
- Start the embroidery process: Once you've loaded the PES file and prepared the fabric, you can begin the embroidery process. Your machine will follow the instructions in the PES file, stitching the design onto the fabric with precision and care.
- Monitor the embroidery: Keep a close eye on the embroidery process, ensuring that the design is stitching correctly and that the fabric remains taut and secure in the hoop. If you notice any issues, such as thread breakage or design misalignment, you may need to pause the process and make adjustments.
- Finish and remove the embroidered piece: When the embroidery is complete, carefully remove the fabric from the hoop and trim any excess threads or stabilizer material. This will help ensure a clean, professional-looking finish to your embroidered project.
By following these steps, you can seamlessly incorporate your converted PES file into your embroidery workflow, allowing you to bring your digital designs to life on a wide range of fabrics and garments.
Remember, the specific steps may vary depending on the type of embroidery machine and software you're using, so be sure to refer to the manufacturer's instructions for guidance on the exact process.
Resources and tutorials for learning more
If you're new to the world of embroidery or are looking to expand your skills in converting JPEG images to PES files, there are a wealth of resources and tutorials available to help you along the way. Here are some recommended resources to check out:
- Embroidery software tutorials: Many of the leading embroidery software providers, such as Brother, Wilcom, and Embrilliance, offer comprehensive tutorials and guides on their respective websites. These resources cover a wide range of topics, including JPEG to PES conversion, design customization, and machine operation.
- Online embroidery communities: Joining online forums, Facebook groups, or subreddits dedicated to embroidery can be an excellent way to connect with experienced enthusiasts, ask questions, and learn from others who have gone through the JPEG to PES conversion process.
- YouTube tutorials: The video-sharing platform YouTube is a treasure trove of embroidery-related tutorials, including step-by-step guides on converting JPEG images to PES files using various software and online tools.
- Embroidery blogs and websites: Many dedicated embroidery blogs and websites offer detailed tutorials, tips, and resources for converting JPEG images to PES files. These sites often provide in-depth information on the process, as well as recommendations for the best tools and software to use.
- Embroidery classes and workshops: If you prefer a more hands-on learning experience, consider enrolling in an embroidery class or workshop, either in-person or online. These sessions can provide personalized guidance and the opportunity to practice the JPEG to PES conversion process with the support of an instructor.
- Manufacturer resources: Don't forget to check the websites and customer support resources of the embroidery machine and software manufacturers you're using. They often have a wealth of information, troubleshooting guides, and FAQs to help you navigate the JPEG to PES conversion process.
By taking advantage of these diverse resources, you'll be well on your way to mastering the art of converting JPEG images into high-quality PES embroidery files, empowering you to bring your digital designs to life through the art of embroidery. Whether you choose to learn digitising yourself or use trusted embroidery digitizing services, understanding the process helps you make better decisions and achieve cleaner embroidery results every time.