How to Digitize a Logo for Embroidery for Free
If you’ve ever tried turning a logo into an embroidery file, you already know the truth: embroidery machines do not magically understand JPG or PNG images. Someone has to convert that artwork into stitch instructions first. That process is called embroidery digitizing.
Many beginners assume they can simply upload an image to their machine and start stitching. Then reality hits harder than a broken needle on a cap frame.
The good news is that if you are just getting started, there are free tools that can help you create a basic embroidery file yourself before investing in professional embroidery digitizing services.
What Is Embroidery Digitizing?
Embroidery digitizing is the process of converting artwork into a machine-readable embroidery file such as DST, PES, EXP, VP3, VIP, JEF, or other machine formats.
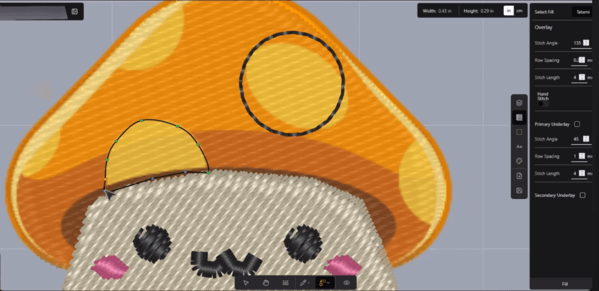
A digitized embroidery file tells the machine how to stitch your design. It includes stitch direction, thread colors, density, underlay, stitch type, trims, and the overall sewing path.
Without proper digitizing, a design can pucker, shift, break thread, lose detail, or simply look messy after stitching.
Can You Digitize a Logo for Free?
Yes, you can digitize a logo for free using trial software such as SewArt. It offers a 30-day demo, which is useful if you only need to create one or two basic embroidery files.
This method is suitable for:
- Hobby embroidery projects
- Simple logos
- One-time personal use
- Learning the basics of embroidery digitizing
- Testing how auto-digitizing software works
However, automatic digitizing has limits. Complex artwork, small lettering, gradients, detailed logos, and cap designs usually need professional manual digitizing.
Need a Professional Embroidery File?
If you want clean, production-ready embroidery files, Embpunch provides professional embroidery digitizing services for logos, caps, patches, jackets, polos, and more.
Software Needed: SewArt
For this tutorial, you will need a program called SewArt. It is a beginner-friendly embroidery digitizing software that allows you to import an image and export embroidery machine files.
SewArt supports several popular machine formats, including:
- DST
- PES
- JEF
- VIP
- VP3
- EXP
- HUS
Step 1: Prepare Your Logo
Before importing your logo, make sure your artwork is clean and clear. A high-quality PNG works best, but JPEG and BMP files can also work.
For better results, use artwork that has:
- Clear outlines
- Solid colors
- Good resolution
- No shadows or gradients
- Minimal tiny details
The cleaner your image is, the better your embroidery file will be.
Step 2: Import the Logo Into SewArt
Open SewArt and drag your logo into the program. Once the logo appears on the screen, click the wizard wand tool to begin the auto-digitizing process.
The wizard will guide you through several steps to simplify the image before turning it into stitches.
Step 3: Reduce the Number of Colors
The first step is reducing the number of colors in your artwork. Embroidery machines do not handle unnecessary color variations well, so this step helps simplify the logo.
Lower the number of colors slowly until your image starts changing in a way you do not want. For example, if two important colors merge together, you have reduced the colors too much.
Choose the lowest number that still keeps your logo looking correct.
Step 4: Merge Similar Colors
Next, SewArt allows you to merge similar colors. This removes tiny color differences that may exist in the image because of compression or anti-aliasing.
This is useful because small color differences can create unnecessary thread changes and messy stitch areas.
Adjust this setting carefully until your artwork is clean but still accurate.
Step 5: Reduce Speckles and Noise
Many images contain small dots, rough edges, or random pixels. These are called speckles. If they are not removed, the software may try to stitch them, creating unnecessary jump stitches and trims.
Use the speckle reduction option to clean up the design. You may not notice a big visual difference on screen, but it can make a major difference in the embroidery output.
Step 6: Merge Small Percentage Colors
This step removes very small color areas from the design. These tiny areas usually do not add value to the final embroidery and can make the machine work harder for no reason.
Increase the setting carefully until unnecessary small areas disappear, while keeping the important parts of the logo intact.
Step 7: Auto Digitize the Logo
After simplifying the artwork, click the Stitch Image button. Then choose Auto Sew Image and select Sew All Colors.
SewArt will now create stitches for the logo automatically. It will assign stitch patterns, color order, and basic embroidery settings.
This is where your image starts becoming an actual embroidery file.
Step 8: Remove the Background
If your logo has a white background, SewArt may treat it as part of the design. To avoid stitching a large white rectangle behind your logo, select the white color block and delete it.
After deleting the background, only the actual logo colors should remain.
Step 9: Save the Embroidery File
Once the design looks correct, go to File > Save As. You can save the cleaned image as a BMP file first, then export the embroidery file format required by your machine.
Common machine formats include:
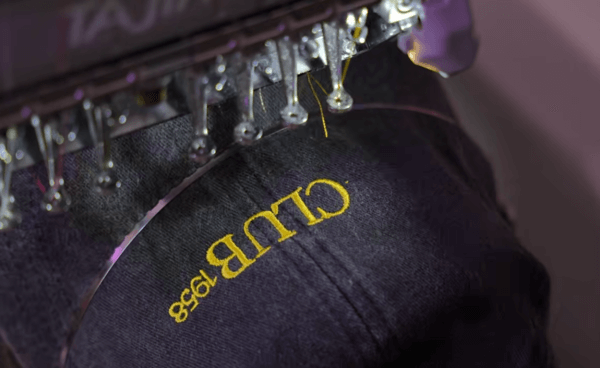
- DST for Tajima and many commercial machines
- PES for Brother machines
- JEF for Janome machines
- VIP for Husqvarna Viking machines
- EXP for Melco and Bernina machines
After saving, SewArt will also show useful details such as stitch count and color sequence.
Limitations of Auto Digitizing
Auto-digitizing is helpful, but it is not perfect. It can work for simple logos, but it often struggles with professional embroidery requirements.
Auto-digitized files may have problems with:
- Small lettering
- Thin outlines
- Complex logos
- Gradients and shadows
- Cap embroidery
- 3D puff embroidery
- Fabric pull compensation
- Proper underlay settings
This is why businesses, apparel brands, and embroidery shops usually prefer professional manual digitizing instead of relying only on automatic software.
When Should You Use Professional Digitizing?
You should consider professional digitizing if your design will be used for customer orders, uniforms, hats, jackets, polos, patches, or any commercial embroidery project.
Professional digitizing is recommended when you need:
- Clean small text
- Smooth satin borders
- Correct stitch density
- Proper underlay
- Better fabric handling
- Cap-friendly digitizing
- Production-ready embroidery files
A properly digitized file can save time, thread, fabric, and machine frustration. In embroidery, one bad file can ruin a garment faster than you can say “thread break.”
Final Thoughts
Creating an embroidery file for free is possible with software like SewArt. It is a useful option for beginners who want to experiment with simple logos and learn how embroidery digitizing works.
However, if you need professional results, manual digitizing is still the better choice. Auto-digitizing can help you learn, but production embroidery requires experience, proper settings, and careful stitch planning.
If your design needs to stitch cleanly the first time, especially for business or customer work, using a professional embroidery digitizing service like Embpunch is the safer option.
Frequently Asked Questions
Can I digitize a logo for free?
Yes, you can use free trials of embroidery digitizing software such as SewArt to create simple embroidery files.
Can I convert a PNG to a DST file?
Yes, embroidery digitizing software can convert PNG artwork into DST files, but the quality depends on the artwork and digitizing settings.
Is auto digitizing good enough?
Auto digitizing can work for simple designs, but professional embroidery usually requires manual digitizing for better stitch quality.
What is the best embroidery file format?
The best format depends on your embroidery machine. DST is widely used for commercial machines, while PES is common for Brother machines.
Why does my embroidery design look bad after stitching?
Common reasons include poor digitizing, wrong density, missing underlay, low-quality artwork, incorrect stabilizer, or using the wrong file format.