To master 3D puff digitizing, start by understanding the basics, like how foam creates raised textures. Use a polyurethane foam thickness between 1.5mm and 3mm for vibrant designs. It’s essential to maintain a stitch spacing of 0.16 mm. Tack down stitches should securely hold the foam in place, and remember to cap properly for a clean finish. Choose foam colors that match your thread to hide any remnants. If you encounter challenges, such as thread tension or complexity issues, there are effective solutions. Keep going, and you’ll uncover more valuable tips and techniques for perfecting your 3D puff designs.
Key Takeaways
- Choose simple designs with a maximum width of 7 mm to prevent splitting during embroidery.
- Set stitch spacing to 0.16 mm for effective foam cutting and high-quality finishes.
- Use strategically placed tack down stitches to secure foam without compressing it.
- Match foam color to thread color for a cohesive appearance and to minimize visible remnants.
- Adjust thread tension for balance; looser top tension helps maintain foam shape during stitching.
Overview of 3D Puff Embroidery
3D puff embroidery is a striking technique that elevates your designs by creating a raised texture using foam beneath the stitches. By incorporating polyurethane foam, typically between 1.5mm to 3mm thick, you achieve a bold design that stands out. This method is perfect for applications like hats, jackets, and bags, where a textured appearance can make logos and text more prominent.
When you’re digitizing 3D foam embroidery, it’s vital to focus on design simplicity. Complex designs can distort during the stitching process, so keeping it straightforward guarantees a clean finish.
Additionally, selecting the right foam is fundamental; the thickness of the foam directly influences how puffed the final product will be.
Don’t forget about stabilizers, either. They’re necessary to support the fabric and foam, preventing any unwanted distortion during the embroidery process.
For the best results, experiment with different combinations of foam and stabilizers to see what works best for your specific designs. With careful planning and execution, you can create stunning 3D puff embroidery that adds depth and character to your projects.
Benefits of Satin Fill
Satin fill really enhances your 3D puff embroidery by providing a smooth, clean finish that highlights the raised texture of the foam. Using a satin stitch for the fill helps maintain the integrity of the foam used, guaranteeing that the structure remains intact while creating a visually appealing design.
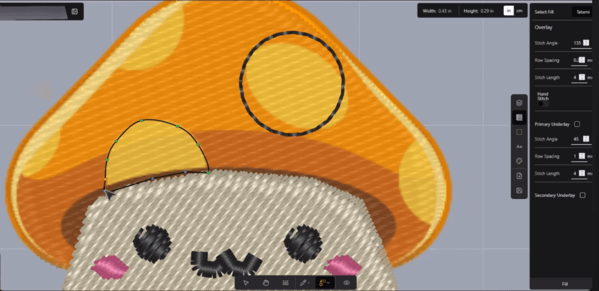
When you’re working on embroidery digitizing, it’s important to set the stitch spacing for satin fill at 0.16 mm. This precise spacing allows for effective cutting of the foam during the embroidery process, preventing any internal stitches that could compromise the foam’s integrity.
For the best results, keep the designs limited to a maximum width of 7 mm to avoid splitting and maintain those clean edges you want. Disabling the auto split feature is also significant for wider satin fill objects, as it helps you steer clear of unintended stitches that could detract from your design.
Ultimately, satin fill not only enhances the aesthetic quality of your 3D puff embroidery but also guarantees durability and a professional finish, making it a crucial element in your embroidery projects.
Importance of Stitch Spacing
Proper stitch spacing is important for achieving a high-quality finish in puffy foam embroidery, guaranteeing that the foam is cut effectively and maintains its integrity. When digitizing your embroidery designs, you should set the standard stitch spacing for puffy foam at 0.16 mm.
This is essential because the default stitch spacing of 0.36 mm in Hatch Embroidery is too wide, which can lead to ineffective cutting and separation of the foam. By utilizing closer needle penetrations in your stitch spacing, you can facilitate easier foam removal after the embroidery process.
This prevents any potential damage to your design, allowing it to look crisp and professional. Proper stitch spacing plays a significant role in cutting through the foam effectively, contributing to that clean, high-quality finish you desire.
It’s important to note that failing to adjust the stitch spacing correctly can result in issues like unwanted stitch splitting or inadequate foam support during embroidery. So, take the time to fine-tune your stitch spacing, and you’ll guarantee that your puffy foam designs turn out just right.
Tack Down Stitches Explained
Tack down stitches play an essential role in securing the foam during the embroidery process, ensuring it stays in place for a clean finish. When you properly execute these stitches, they help maintain the foam’s form beneath the satin stitches, enhancing the overall 3D effect.
Here’s a quick overview of the key aspects of tack down stitches:
| Aspect | Importance |
|---|---|
| Stitch Type | Single run stitch to minimize foam compression |
| Length | Approximately 4 mm for effective securing |
| Positioning | Centrally positioned within the design |
| Underlays | Avoid underlays to keep foam elevated |
| Spacing | Match satin fill spacing of 0.16 mm for precision |
Proper Capping Techniques
Aligning capping objects with the edges of the foam design is essential for achieving a secure and clean finish. When you use proper capping techniques, you guarantee that your design not only looks professional but also maintains its integrity over time.
Here are three significant steps to follow:
-
Narrower Width: Design your capping to have a narrower width that feathers inward. This creates a smooth shift between the foam and the Satin stitches.
-
Stitch Spacing: Set your stitch spacing for capping at 0.16 mm. This consistency with the rest of the foam digitizing helps prevent unraveling and enhances the overall cleaner appearance.
-
Remove Underlays: Don’t forget to remove underlays when digitizing capping stitches. This step is essential as it prevents compressing the foam, guaranteeing a cleaner final product.
Capping stitches are key in securing the foam and preventing any protrusion, which boosts the integrity of the design. By following these techniques, you’ll achieve a polished look that stands out.
Selecting Foam Colors
After mastering capping techniques, selecting the right foam colors can greatly enhance the overall appearance of your 3D puff embroidery. It’s vital to match the foam color closely with the thread color to minimize the visibility of foam remnants after stitching.
However, don’t shy away from exploring a wide range of foam colors; this can open up new avenues for creativity and personalization in your design choices.
When you’re aiming for a standout look, consider using contrasting colors between the foam and fabric. This technique can considerably enhance the 3D effect, making your design more prominent and eye-catching. Always keep the final application of the embroidered item in mind, as certain color combinations may resonate better with your target audience or intended use.
Before making a final decision, testing foam color samples against your selected thread and fabric in natural lighting is vital. This guarantees a cohesive and appealing final appearance.
Embroidery Process Steps
To achieve a successful 3D puff embroidery, start by creating a bold design with clear outlines, guaranteeing no elements exceed 7 mm in width for ideal digitizing. This step is vital to maintain the integrity of your puffy design.
Here are three key steps to follow in the embroidery process:
-
Set Stitch Spacing: Use a stitch spacing of 0.16 mm. This closer spacing effectively cuts the foam while allowing for easy removal after the embroidery is complete.
-
Incorporate Tack Down Stitches: Digitize a single run tack down stitch in the center of your design with a length of 4 mm. This secures the foam without compressing it, making sure the 3D effect remains intact.
-
Apply Capping: Confirm capping is applied at the ends of Satin objects to secure the foam and prevent unraveling. Keep the capping stitch spacing at 0.16 mm for a clean finish.
Common Challenges and Solutions
When you’re working with 3D puff digitizing, you’ll likely face challenges like thread tension issues and complex design elements.
It’s crucial to understand foam removal techniques to achieve a polished finish.
Let’s explore some common problems and their solutions to help you navigate this process more effectively.
Thread Tension Issues
Thread tension plays an essential role in achieving the perfect 3D puff effect, and getting it right can be a challenge for many embroiderers.
If you’re struggling with thread tension, here are three common issues and their solutions:
-
Excessive Foam Compression: Too much tension can flatten your design. Try adjusting your top thread tension slightly looser than usual to allow the foam to maintain its shape.
-
Unbalanced Stitch: If the bobbin thread tension is too tight, it can pull the foam down, ruining the 3D effect. Lowering the bobbin thread tension can help create a more balanced stitch.
-
Inconsistent Results: Variations in foam thickness or needle choice may require ongoing adjustments. Regularly testing thread tension on scrap pieces before starting your final design is vital. This will help you identify the ideal settings for different types of foam and fabrics.
Foam Removal Techniques
Removing foam from a 3D puff design can be tricky, but with the right techniques, you can achieve a clean finish.
Start by verifying that your stitch spacing is set at 0.16 mm. This setting allows for easy cutting of excess foam without needing excessive force. After the embroidery is complete, you’ll want to focus on careful trimming of the foam to maintain the integrity of the stitched design.
To effectively remove foam remnants, consider using tweezers or a low-setting heat gun. These tools are great for loosening foam without damaging the surrounding fabric or stitches.
Remember to avoid compressing the foam during the embroidery process by loosening the top thread, which will help make removal smoother later on.
Additionally, matching the foam color to the thread color can appreciably minimize the visibility of any foam remnants after removal.
By incorporating these foam removal techniques, you’ll not only verify a polished look but also protect your stitched design from potential damage.
With patience and practice, you’ll master the art of removing foam for a flawless 3D puff effect.
Design Complexity Challenges
Maneuvering design complexity in 3D puff digitizing can present several challenges that require careful attention to detail and technique. Here are three common hurdles you might face:
-
Foam Thickness: Guarantee designs don’t exceed 7 mm in width to prevent splitting.
-
Stitch Spacing: Maintain a stitch spacing of 0.16 mm for effective foam cutting, as wider spacing can lead to a rough finish.
-
Tack Down Stitches: Set these at 4 mm to secure foam without compressing it.
Achieving a stable 3D effect hinges on addressing these challenges.
Eliminating underlays is vital; instead, strategically placed tack down stitches will help maintain the foam’s elevation.
When working on satin objects, precise capping at the edges is necessary to secure the foam and prevent unraveling.
Poor alignment here can complicate your design, so be mindful of both stitch spacing and placement.
Conclusion
In wrapping up your journey into 3D puff digitizing, remember that each stitch is a stepping stone to creating stunning designs.
Embrace the unique challenges and solutions that come your way, as they only add to your skill set.
With practice, you’ll transform ordinary embroidery into eye-catching masterpieces that pop like confetti at a celebration.