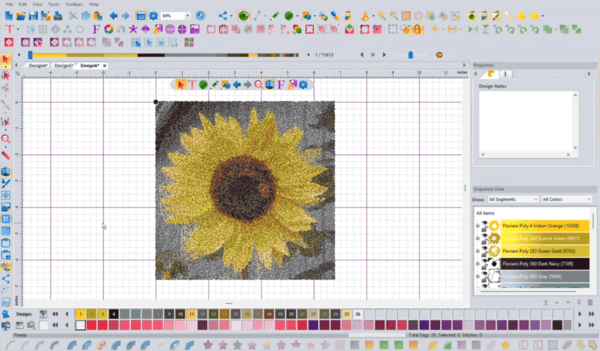
If you've ever dreamt of turning your favorite images into beautifully embroidered designs without spending a dime, look no further. Converting an image to an embroidery file for free is within your reach is an art in the field of embroidery.
With the rise of online embroidery digitizing, hobbyists and small businesses no longer need expensive software or professional help to get started. By utilising tools like Wilcom Truesizer Web, you can easily bring your creativity to life. Simply log in, upload your design, tweak it to perfection, and save it in your preferred format.
This process not only enables you to personalise your craft embroidery projects but also allows you to create unique gifts and explore your artistic side by transforming images into intricate embroidery patterns. All of this can be achieved using free software, without relying on embroidery digitizing services if your design is not that complex.
Converting Image to Embroidery File Overview
To convert an image to an embroidery file for free, you need to utilize specialized software tools and follow a series of steps. There are various free digitizing software options available that can assist you in converting an image to an embroidery file. Software such as Embird, My Editor, and Ink/Stitch are popular choices for this purpose.
These programs allow users to perform basic online embroidery digitizing tasks and convert images into machine-compatible embroidery formats at no cost. While free tools are ideal for beginners and personal projects, professional embroidery digitizing services offer advanced precision.
Once you have selected the software of your choice, you can proceed with converting your image to an embroidery file by following the specific instructions provided by the software. After successfully converting the image, you can then move on to the required image file manipulation steps to further refine your design.
Required Image File Manipulation Steps
For this process, you'll need to carefully adjust the image file to ensure optimal embroidery quality. Start by placing the image file into the program and cropping it if necessary.
Next, set the desired size of the picture and lock it before converting it into an embroidery design. Many online embroidery digitizing tools provide measurement, zoom, and object tools that help maintain accuracy during digitisation.
It's crucial to change the measurement options and measure the object before commencing digitization to ensure accuracy. Additionally, adjust stitch types, lengths, and properties to customize different elements like needles and thread lines, creating realistic embroidery shapes.
Starting Logo Digitizing Process
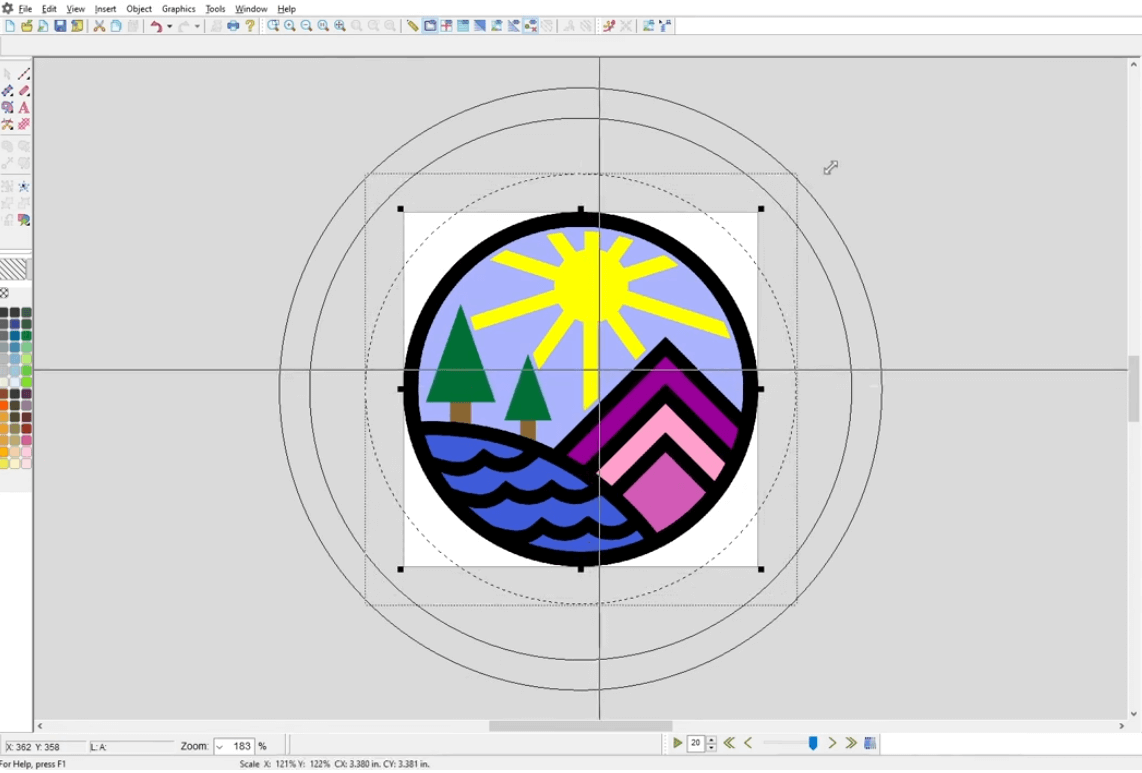
Begin by carefully inserting the logo into your digitizing program. Use free software to convert the image into an embroidery file. In the digitizing software, select sizes, stitch types, and thread colors that match your logo.
This step is critical, whether you’re doing DIY digitising or evaluating best embroidery digitizing services, because incorrect stitch settings can ruin the final output.
Digitize the embroidery by setting stitch directions for your embroidery machine. Once you have tailored all the settings to your liking, transfer the file to your embroidery machine for stitching. This process sets the foundation for a successful embroidery project, ensuring that your logo is accurately represented in the final product.
After completing the starting logo digitizing process, you'll be ready to move on to applying additional settings for embroidery, further enhancing the quality and detail of your design.
Applying Additional Settings for Embroidery
When adjusting additional settings for embroidery, you can enhance your designs with:
- Color selection tips
- Stitch density adjustments
- Resizing for embroidery
These refinements are what differentiate basic designs from professional-quality embroidery, even when done through online embroidery digitizing tools.
Color Selection Tips
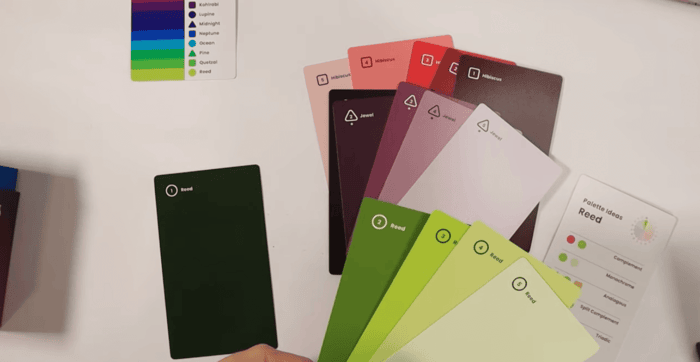
Utilizing appropriate thread colors is crucial when optimizing embroidery files for a professional finish. When converting an image to an embroidery file for free, consider the following color selection tips:
- Convert Image Format: Start by converting your image to a suitable format like JPG or PNG for compatibility with embroidery software.
- Color Bar Examination: Review the color bar of your design to ensure a harmonious color scheme that complements the logo or image.
- Incorporate Fill Stitch: Utilize fill stitches effectively to add texture and depth to your embroidery design.
- Adjust Color Variations: Make necessary adjustments for color variations to enhance the visual appeal of the final embroidered piece.
Stitch Density Adjustment
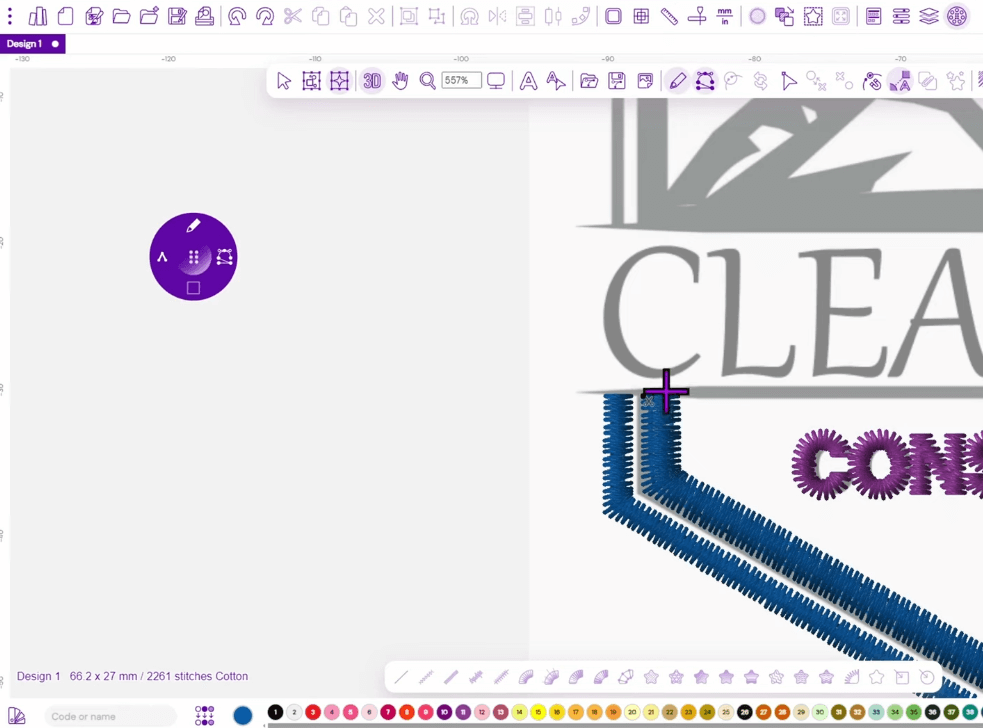
To improve the quality and accuracy of your embroidery output, adjust the stitch density appropriately. When converting an image to an embroidery file, consider the stitch density to ensure the design translates well onto fabric. Here are some additional settings you can apply for optimal results:
| Stitch Type | Density Level |
| Fill Stitch | High |
| Satin Stitch |
Medium |
| Running Stitch | Low |
| Zigzag Stitch | Medium |
| Chain Stitch | High |
Resize for Embroidery
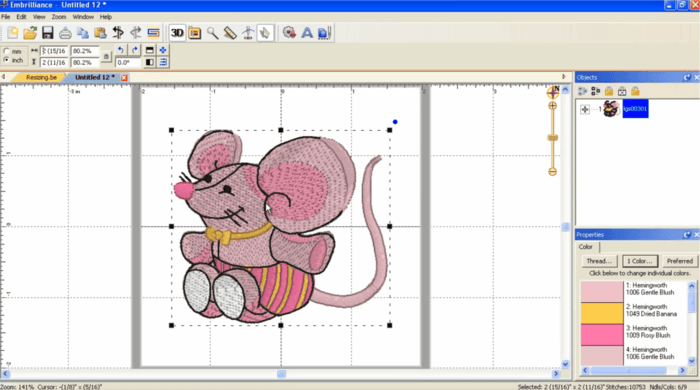
To resize an image effectively for embroidery, first select the desired embroidery file and access the resizing options. Follow these steps to optimize the resizing process for digitizing your designs:
- Choose the appropriate size: Determine the dimensions needed for your embroidery project.
- Adjust measurement settings: Change the units to match the requirements of the embroidery format.
- Use object measurement tools: Make use of tools that allow you to measure and resize objects accurately.
- Refine with stitch adjustments: Fine-tune the resizing process by adjusting stitch types and densities.
Transitioning into the subsequent section about 'understanding embroidery file formats,' these steps will ensure that your resized design is ready for conversion into the appropriate embroidery format.
Understanding Embroidery File Formats
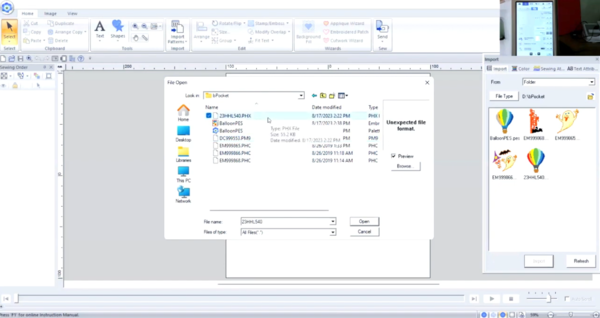
When converting an image into embroidery, it’s important to understand that embroidery files are not images but machine instructions. Top embroidery digitizing services use specific file formats to ensure machines stitch correctly.
| Image Formats | Embroidery File Formats |
| JPG | PES |
| GIF | DST |
| PNG | JEF |
| EXP | |
| XXX |
Understanding these file formats is crucial as they determine the type of embroidery file that your machine can read and execute. Additionally, being knowledgeable about embroidery file formats can help you save on the cost of embroidery digitizing . Now, let's delve into choosing suitable images for conversion.
Choosing Suitable Images for Conversion
- Look for images with clear outlines and distinct colors when selecting designs for conversion to embroidery files. This will simplify the process of converting an image into machine embroidery designs, ensuring better results.
- Opt for vector-based images as they provide cleaner lines and are easier to convert into embroidery files. These images facilitate the conversion process and result in more defined stitch areas.
- Choose high-resolution images to capture finer details that translate well into embroidery designs. Higher resolution images are recommended for better embroidery outcomes.
- Select images with fewer colors and solid areas to make the conversion process smoother and yield cleaner stitch areas. Images with well-defined and simple shapes are ideal for converting from a JPG to an embroidery file, especially when starting out with the conversion process.
These principles are followed by professional embroidery digitizing services and should be applied even when working independently.
Embroidery Digitizing Explained
Choosing suitable images for conversion involves understanding the intricacies of embroidery digitizing. Whether done manually or via online embroidery digitizing software, this process requires attention to stitch direction, density, and sequencing.
The use of this tool requires attention to detail in selecting stitch types, sizes, and directions to ensure the final embroidered design is accurate. Additionally, considering file size is important as it can impact the quality of the embroidery output.
By grasping the fundamentals of embroidery digitizing, you can efficiently convert images into embroidery files that produce high-quality results on your garments or fabrics. Understanding these aspects will aid you in creating intricate embroidery designs that capture the essence of the original image.
As you delve into the world of embroidery digitizing, you'll find that mastering this skill opens up a realm of creative possibilities for your projects. This foundation sets the stage for exploring advanced techniques like background removal for embroidery designs.
Background Removal for Embroidery Designs
As you delve into the intricate world of embroidery digitizing, it's essential to grasp the importance of background removal in refining and simplifying your designs for optimal embroidery conversion. When aiming to convert an image to an embroidery-friendly format like a DST file, the process of removing the background plays a crucial role.
Here's a quick guide to help you with background removal for embroidery designs:
- Use Tools: Utilize software like Photoshop or online services to remove the background from your image.
- Focus on Clean Designs: Removing backgrounds helps in simplifying images, reducing thread count, and enhancing the efficiency of the embroidery production process.
- Ideal Image Quality: Clean, high-resolution images with clear outlines and distinct colors are perfect for embroidery conversion.
- Import SVG into Inkscape: To further refine your design, import the SVG file into Inkscape for additional editing before saving it as a JPG for embroidery purposes.
Converting Image Using SewArt Software
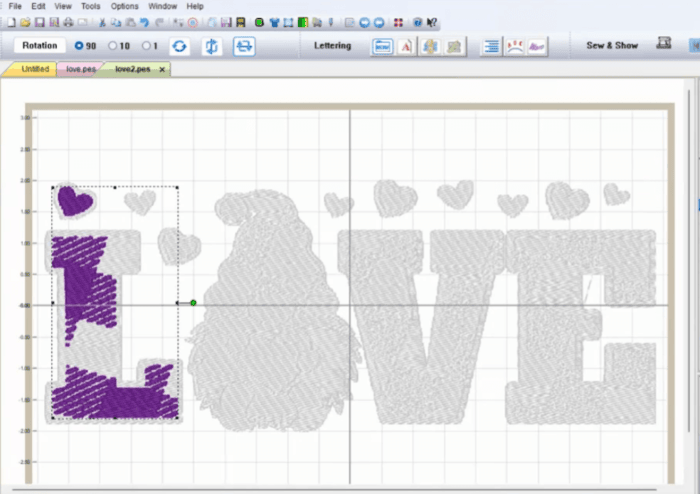
For optimal embroidery conversion results, refine your design by converting the image using SewArt software. To begin, select the file you want to convert to an embroidery design.
With SewArt, you can use various stitch types to enhance the details of your image. Experiment with different stitch options to achieve the desired texture and look for your embroidery project. While SewArt is not a replacement for full-scale embroidery digitizing services, it’s an excellent tool for small projects and personal use.
SewArt offers a user-friendly interface that simplifies the process of converting images to embroidery files. Whether you're a beginner or experienced embroiderer, SewArt provides the tools needed to create stunning designs.
Additionally, if you're working with a Brother Embroidery machine, SewArt seamlessly integrates with this equipment for a smooth workflow. By utilizing SewArt for your embroidery digitizing needs, you can achieve professional results with less hassle.
Get started today by exploring the capabilities of SewArt software and transform your images into beautiful embroidery designs.
Converting Image Using Ink/Stitch Software
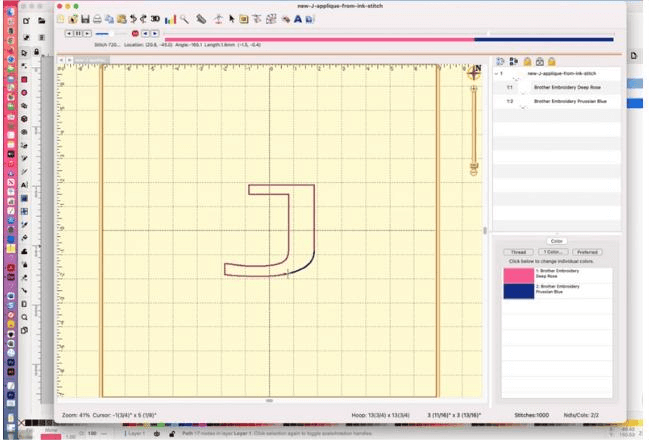
To transition from converting images using SewArt software, now explore transforming your designs with Ink/Stitch software for embroidery file conversion. When using Ink/Stitch software, follow these steps to convert your image to an embroidery file:
- Open Image: Begin by opening the image you want to convert in the Ink/Stitch software.
- Reduce Colors: Utilize the tools provided in the software to reduce the number of colors in your image for better embroidery results.
- Assign Stitch Types: Use the left mouse button to assign different stitch types to various elements of your design.
- Finalize and Convert: Once you're satisfied with the adjustments made, finalize the settings and convert the image to an embroidery file using the software's functions.
Ink/Stitch is widely used in online embroidery digitizing communities due to its flexibility and professional-level control.
Conclusion
Now that you've learned how to convert an image to an embroidery file for free, you can unleash your creativity and personalize your craft projects effortlessly.
Free tools like Wilcom Truesizer Web, Ink/Stitch, and SewArt allow you to explore creativity before investing in quality embroidery digitizing services.
So, get started on creating unique gifts and enhancing your creativity through the art of embroidery today!
Frequently Asked Questions
How Do I Turn an Image Into an Embroidery File?
Want to bring your image to life through embroidery? Follow easy steps on Wilcom Truesizer web, open, adjust, and save in your desired format. Utilize Embird, My Editor, or Ink/Stitch for free conversion. Simplify images by tracing in Illustrator and reducing thread count.
How Do I Convert a JPG to PES Embroidery for Free?
To convert a jpg to pes embroidery for free, just use online tools like Wilcom Truesizer web. Log in, open your file, adjust it as needed, and save it in pes format. Choose a storage spot and rename it if required.
How Do I Create an Embroidery File?
You create an embroidery file by digitizing designs, selecting sizes and stitch types, matching thread colors, and transferring the file to your machine for stitching. Simplify images by tracing in Illustrator, reducing thread count, and using auto-digitizing tools like Photosnap.
What Is the App That Turns Photos Into Embroidery Patterns?
You can use the Wilcom Truesizer web, the app that transforms photos into embroidery patterns for free. Log in, open the design, adjust it, and save in your preferred format. This tool simplifies image conversion for embroidery enthusiasts.
