Embroidery Isn’t Just Decoration. It’s Leverage. Most people think online embroidery digitizing or simply embroidery is cute patterns and colourful threads. Wrong. It’s storytelling with precision. It’s heritage, design, and craftsmanship, engineered stitch by stitch.
At EMBpunch, we don’t just thread needles, we build visual assets. Whether you’re a hobbyist, a fashion startup, or a brand scaling with custom merch, knowing your embroidery stitches isn’t just optional, it’s the foundation for scalable design output. This is what we guarantee you with our professional embroidery digitizing services.
Let’s break it down and give you the real-world tools to go from thread-dabbler to embroidery operator.
Start Here: The 3 Things You Actually Need
1. Needle + Thread = Your Basic Tech Stack
Everything starts here. Your “hardware” is a needle. Your “interface” is thread. And not all threads are created equal:
-
Cotton: Reliable, matte finish.
-
Silk: Luxurious, smooth, expensive.
-
Rayon: Shiny, high-sheen, less durable.
-
Wool: Bold texture, heavier stitch.
Pick the right thread for the job. It changes the output, durability, and impact.
Need a Professional Embroidery File?
If you want clean, production-ready embroidery files, Embpunch provides professional embroidery digitizing services for logos, caps, patches, jackets, polos, and more.
2. Fabric = Your Operating System
Your fabric determines your stitch compatibility. Think of it like a platform.
-
Even-weave (Linen, Aida): Best for counted-thread work (like cross-stitch).
-
Cotton blends: Great for satin, stem, and surface stitches.
-
Stretch fabrics: Harder to control tension, use stabilizers.
-
Bottom line: Using the wrong fabric yields poor results.
3. The Hoop = Your Version Control
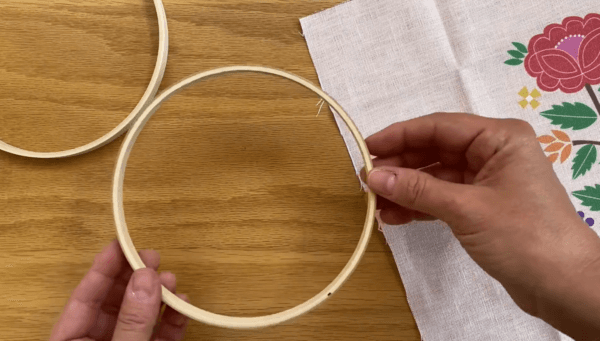
Without a hoop, your work loses shape. Tension drifts. Precision dies.
Use a hoop to keep stitches tight and consistent. Pair it with your embroidery “tool kit”:
-
Sharp scissors
-
Needle threader
-
Fabric marker
-
Stabilizers
It’s not fancy. It’s necessary. Your kit isn’t just for convenience, it’s for speed and scale.
Old School Meets New School: Traditional Tools vs. Modern Tech
Before: You had a needle and your hands. That’s it.
Now: You’ve got options.
-
Water-soluble stabilizers → cleaner backing, no residue
-
Heat/friction pens → mark precisely, erase instantly
-
Embroidery digitizing software → convert art into machine-ready files
Quick Note:
If you're running embroidery as a business, modern tools = faster turnaround + more profit per hour.
What Are the Different Types of Hand Embroidery Stitches?
There are more than a hundred embroidery stitches worldwide, but these are some of the most common and effective ones to master:
1. Backstitch

What it is: The backbone of outlines.
Why it works: It's not flashy, it’s functional. Gives you clean, tight, strong lines, no gaps, no weak points.
Use case: Outlines, lettering, linear patterns. If your embroidery design needs structure, this stitch is the damn blueprint.
Pro Tip: If you're skipping this, you're building embroidery on sand. Master it. Use it. Own it.
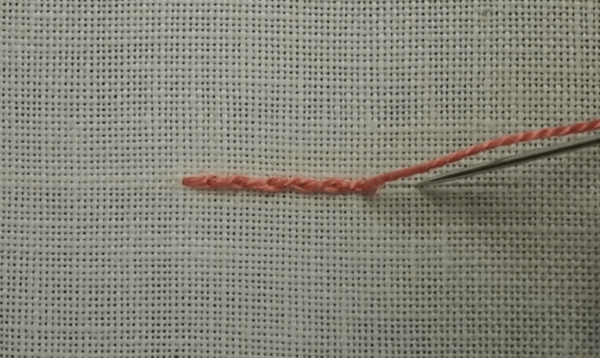
2. Running Stitch

What it is: The most basic stitch.
Why it works: Simple mechanics. In → out → repeat. That’s it. But don’t confuse basic with useless, it’s versatile AF.
Use case: Borders, outlines, tacking things down temporarily.
Pro tip: This is your warm-up. If your running stitch looks sloppy, don’t even try the fancy stuff.
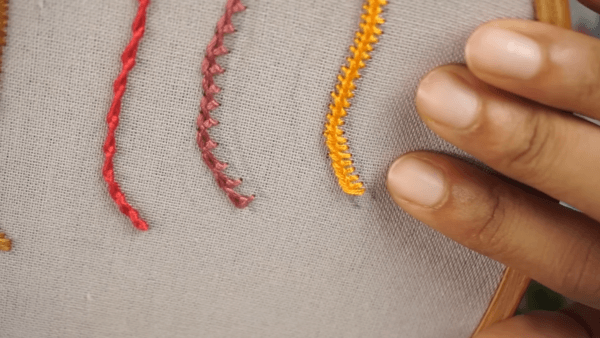
3. Straight Stitch
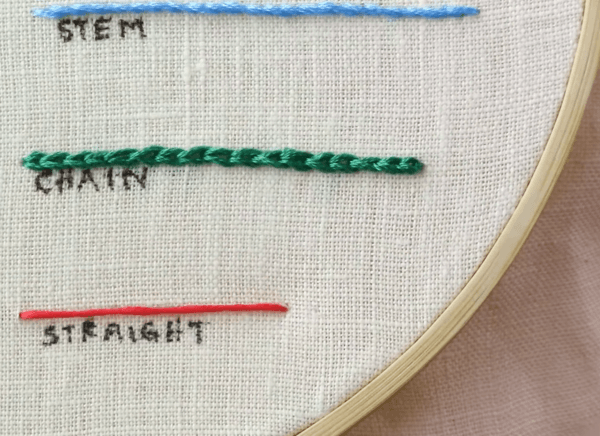
What it is: One stitch. One direction. No curves. No complexity.
Why it works: Minimal input, max control. It’s how you pepper texture, scatter patterns, or fill tiny shapes.
Use case: Eyes, stars, small floral details.
Think of it as: The embroidery version of single-rep sets, tight, fast, to the point.
4. French Knot
What it is: A coiled knot that lifts off the fabric.
Why it works: Because flat designs get ignored. This stitch adds dimension and commands attention.
Use case: Flower centers, small accents, anything that needs a 3D effect.
Pro insight: Mess it up and it looks like a lumpy accident. Get it right and it pops, literally.
5. Stem Stitch
What it is: A fluid, twisted stitch that mimics rope.
Why it works: Curves. Movement. Continuity. It handles all of it.
Use case: Flower stems, outlines with curves, script fonts.
Bottom line: It’s the calligraphy of embroidery. Grace meets control.
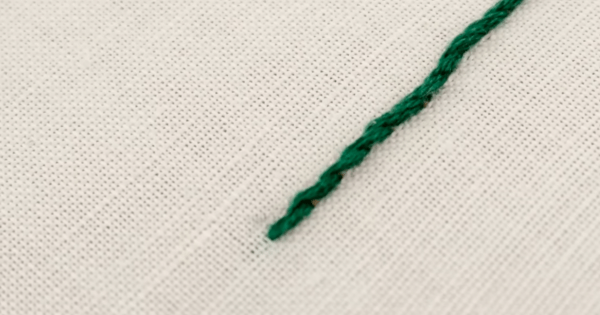
6. Chain Stitch
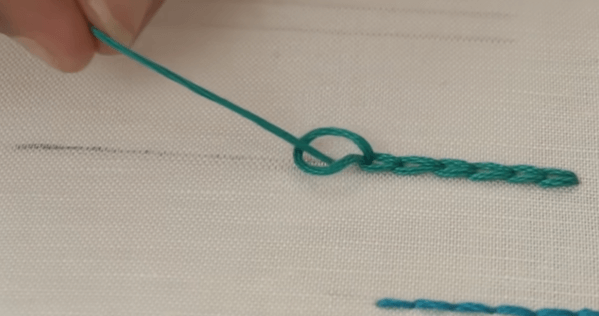
What it is: Interlocking loops stacked like chain links.
Why it works: Bold texture. Loops catch light and add serious character to borders.
Use case: Outlines, decorative borders, big text.
The flex: It looks harder than it is. That's leverage.
7. Satin Stitch
What it is: A smooth stitch that covers space like a paint roller.
Why it works: You want solid colour? This lays down thread like velvet.
Use case: Filled shapes (think leaves, petals, letters).
Key advice: Tension is everything. Too loose = messy. Too tight = warped fabric. Get the feel right.
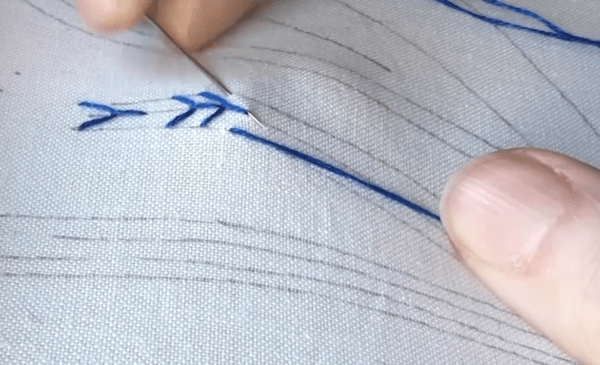
8. Feather Stitch
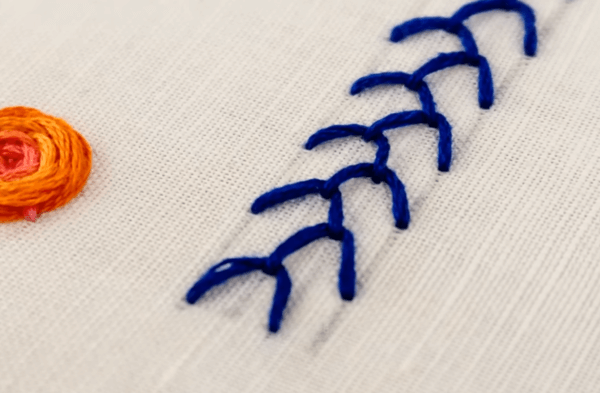
What it is: A soft, flowing, decorative stitch that creates angled Vs.
Why it works: Looks intricate without being overly complex. Adds flair with purpose.
Use case: Decorative seams, borders, vine-like patterns.
Strategy tip: Use it to frame your embroidery design or add softness between bold elements.
9. Split Stitch
What it is: A variation of backstitch where the needle splits the previous stitch.
Why it works: It’s tighter, more textured, and gives a braided look. Adds depth.
Use case: Detailed outlines, textured fills.
What you’ll love: Once you feel it under your fingers, you’ll get why professionals swear by it.
10. Detached Chain Stitch (Lazy Daisy)
What it is: A loop anchored at the end, looks like a flower petal.
Why it works: Petal perfection. It’s how you make flowers without overthinking it.
Use case: Floral patterns, decorative accents.
Remember: Precision matters. It’s lazy in name, not in execution.
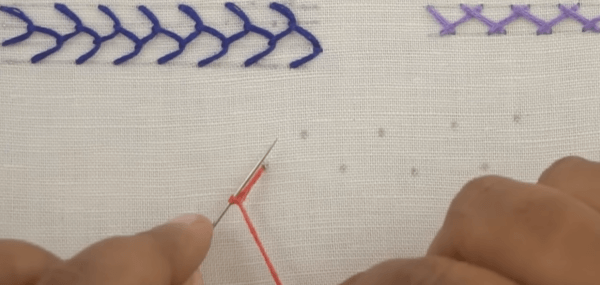
11. Fly Stitch
What it is: V-shaped, spaced-out, relaxed.
Why it works: Fills space without crowding it. Looks effortless but deliberate.
Use case: Leaves, ferns, fillers.
Advice: Think of it as breathing room for your embroidery. Adds rhythm and movement.
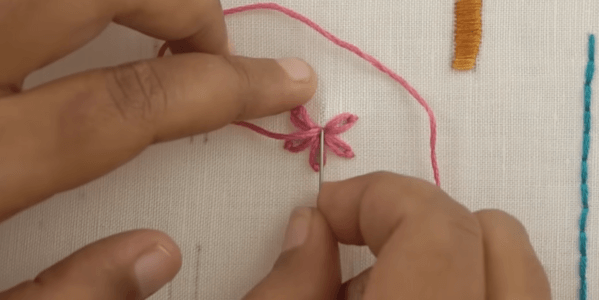
12. Woven Wheel Stitch
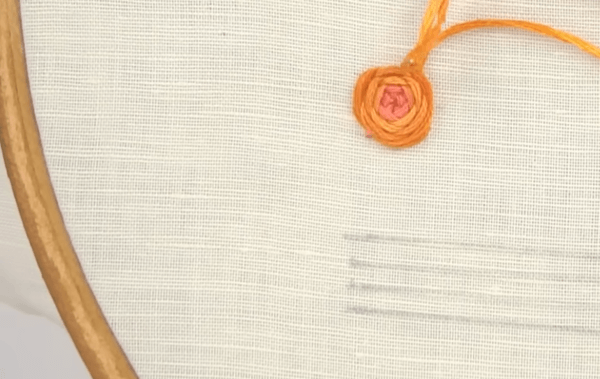
What it is: A circular stitch that literally weaves thread into a wheel.
Why it works: Looks like a rose. Pure visual punch.
Use case: Statement flowers, embellishments, decorative focal points.
The win: When you show people this, they’ll ask if it’s store-bought. Let them.
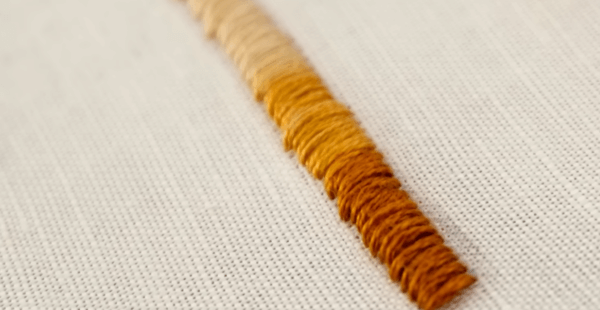
13. Couching Stitch
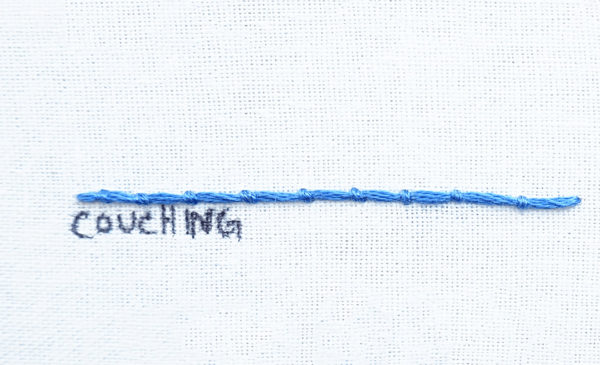
What it is: You lay a thick thread on the surface, then tack it down with little stitches.
Why it works: Big design. Minimal effort. Maximum visual impact.
Use case: Gold thread, outlines with texture, lettering.
Pro tip: Use metallic or chunky thread for drama. Let the small stitch do the work.
14. Blanket Stitch
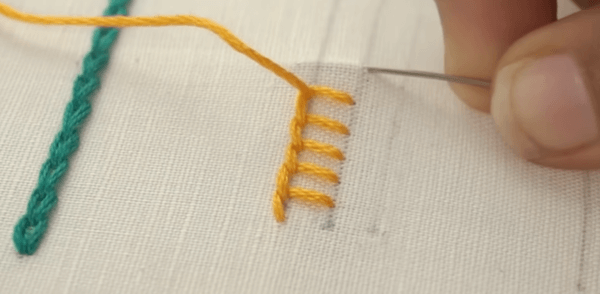
What it is: Reinforcement + beauty.
Why it works: It grips the edge like a clamp while looking decorative.
Use case: Appliqué, edges of fabric, patchwork.
What it says: I finish what I start, with style.
15. Bullion Knot
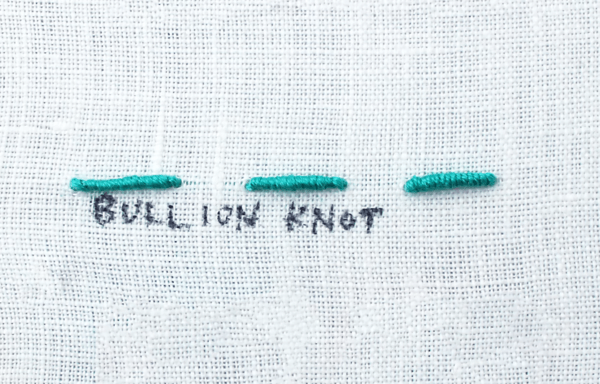
What it is: A tightly coiled stitch that looks like a spring.
Why it works: It’s dimensional, intricate, and screams “handmade skill.”
Use case: Roses, bugs, fancy detailing.
Truth: You will screw it up at first. That’s part of the price. But once you get it, it’s a flex.
Techniques That Define the Craft of Hand Embroidery
-
Open Work
You’re not just stitching, you’re removing fabric threads to build the embroidery design. This is negative space done right. If you're not scared to cut, this adds drama fast.
-
Counted Thread Work
Precision over everything. You count every thread in the fabric to place stitches exactly where they belong. Think cross-stitch on hard mode. No guesswork. All discipline.
-
Outline Work
You’re not filling. You’re framing. Use stitches like stem or backstitch to carve out clean shapes and borders. Like sketching, but with thread. Fast. Clean. Iconic.
-
Void Work
You want to make something stand out? Don’t stitch it. Stitch around it. The embroidery design emerges by what you leave out. It’s the embroidery version of “less is more.”
-
Raised Work (Stumpwork)
Flat is for amateurs. This is 3D. You pad the back or use wire to literally lift your design off the fabric. Great for texture, impact, and turning heads.
-
Whitework
White on white. No colour tricks, just pure stitch skill. Subtle. Elegant. If you can make white thread on white fabric look like art, you’re not a beginner anymore.
-
Needle Weaving
You turn the fabric into your loom. Forget embrodiery machines. You manually weave patterns thread-by-thread right onto the fabric. Control. Texture. Total mastery.
-
Candlewicking Embroidery
This is whitework with punch. Uses heavy knots and thick white thread for a bold raised look. Old-school, but timeless. Think farmhouse meets luxury spa towel.
-
Crazy Patchwork Embroidery
No rules. No limits. Patch different fabrics together, then go wild with decorative stitches. It's chaotic beauty, and it's meant to look extra.
-
Shadow Work
This is embroidery in reverse. You stitch from the back, and the design shows up as a soft shadow on the front. Subtle. Sophisticated. And totally unexpected.
-
Broderie Anglaise
You cut fabric, add eyelets, and stitch around them. The result? Lace-like beauty with a bold edge. It’s embroidery meets precision knife work.
-
Redwork Embroidery
One colour. Maximum punch. Red on white fabric. Clean lines. Bold contrast. This is minimalism that hits. No fillers. Just form.
-
Dotting Work
Tiny stitches. Repeated again and again until patterns emerge. It's less about flair and more about discipline and control. Like pointillism, but for fabric.
-
Pattern Darning
It’s all running stitch, but done smart. You layer them in grids, zig-zags, diamonds, and more until it turns into geometric art. This is simplicity, leveled up.
Common vs Rare Hand Embroidery Attributes
Common Attributes in Hand Embroidery Stitching
-
Thread-based artistry
-
Requires tools like hoop and scissors
-
Decorative purpose
-
Manual process
-
Often time-consuming
Rare Hand Embroidery Attributes That Add Magic
-
Metallic threads or goldwork
-
Raised texture or padding
-
Beading and sequin integration
-
Symbolic or ritualistic patterns
Unique Traits
-
Translating a visual design into stitch language
-
Requires deep knowledge of stitch mechanics
-
Integration with embroidery software in digitized embroidery
Embroidery in a Digitized World
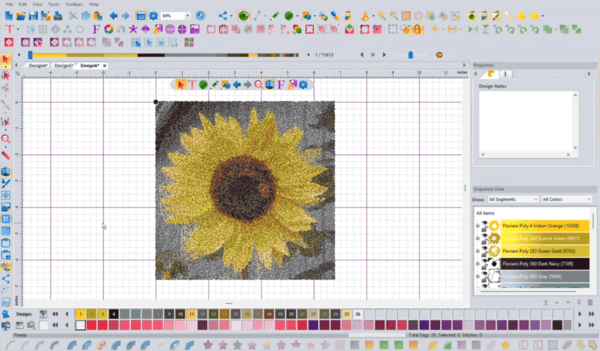
At EMBpunch, we help bridge traditional artistry with cutting-edge embroidery digitizing. Whether you're digitizing a chain stitch embroidery, outline stitch embroidery, or a complex surface embellishment, our team turns artwork into scalable .DST, .PES, and .JEF files compatible with commercial machines. We’ve worked with fashion startups, merch brands, and local artisans to deliver precision digitizing, fast turnaround, and stitch-ready results.
How to Start and Master Hand Embroidery: A Guide for Beginners?
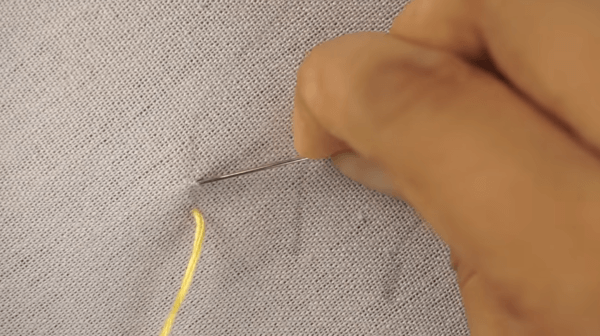
How to Thread a Needle and Start Your First Stitch?
-
Use a needle threader if needed.
-
Tie a knot at the end of your thread.
-
Start from the back of the fabric to hide knots.
How to Make, End, and Remove Stitches?
-
End with a knot at the back or weave under other stitches.
-
To remove a stitch, carefully cut with embroidery scissors and pull thread out.
Common Mistakes Beginners Make (and How to Avoid Them)
-
Pulling too tight
-
Using the wrong needle
-
Not securing stitches at start/end
-
Skipping the hoop
Best Fabrics and Threads to Start With
-
Cotton or linen fabric
-
Embroidery floss with 6 strands (e.g. DMC)
Frequently Asked Questions (FAQs)
Q. What are the different types of hand embroidery stitches?
A. Refer to the comprehensive list above including satin, stem, chain, etc.
Q. Which stitch is a temporary hand stitch?
A. Running stitch or basting stitch is often used temporarily.
Q. What are the 5 types of embroidery?
A. Open work, counted thread, outline work, whitework, raised work.
Q. How many stitches are there in hand embroidery?
A. Hundreds, though around 20-30 are commonly used.
Q. What is 100% embroidery?
A. This refers to complete coverage of the fabric surface with stitches.
Q. What are the four famous embroideries?
A. Chikankari (India), Zardozi, Broderie Anglaise, Crewel.
Q. What type of embroidery is best?
A. Depends on the project. For bold work, satin stitch; for detail, backstitch.
Q. What is 6-strand embroidery?
A. Floss composed of six separable threads. Allows for varying thickness.
Q. What is Luneville embroidery?
A. French couture technique using a tambour hook. Often beaded.
Q. What is tambour stitch?
A. Looped stitch made with a hook; forms a chain-like effect.
Q. How to do fishbone stitch?
A. Used for leaves. Stitch alternates sides with overlapping V pattern.
Q. What is crewel stitching?
A. Wool thread on linen with a variety of traditional stitches.
Q. What is fern stitch in embroidery?
A. A decorative open stitch resembling fern leaves.
Q. What is pen stitching?
A. Outline technique mimicking drawn pen lines, often backstitch.
Q. What is Jali stitch?
A. An Indian openwork embroidery forming lattice-like patterns.
Q. What is Hungarian stitch?
A. Diagonal stitches forming small blocks; used in canvas work.
Q. What is Hermes stitch?
A. A slanted stitch used for detailing in luxury fashion embroidery.
Q. How to do a crocodile stitch?
A. Not traditional in embroidery; more common in crochet.
Q. How to do herringbone stitches?
A. Crisscrossed diagonal stitches forming a zigzag pattern.
Q. How to lazy daisy stitch?
A. Anchor a loop with a small stitch to form petals.
Q. How to embroider?
A. Start with basic stitches, a hoop, fabric, needle, and floss.
Q. How to start an embroidery stitch?
A. Bring needle from back, pull through, and anchor with first stitch.
Q. How to make embroidery stitches?
A. Practice with guidelines, tutorials, or pre-printed patterns.
Q. How to end an embroidery stitch?
A. Tie a knot or weave thread into back stitches.
Q. How to embroider a stitch?
A. Follow pattern or freehand design using needle and thread.
Q. How to remove embroidery?
A. Use a seam ripper or embroidery scissors to gently undo stitches.
Q. How to thread an embroidery needle?
A. Use a needle threader or moisten tip and insert manually.
Q. How to do an embroidery stitch?
A. Choose stitch, push needle through fabric, repeat sequence.
Q. How to finish an embroidery stitch?
A. Secure with knot or stitch under.
Q. How to thread a needle?
A. Cut thread end cleanly, insert through eye manually or with threader.
Summing Up
Whether you’re crafting a family heirloom, decorating apparel, or converting your artwork into machine-friendly formats, understanding the many types of embroidery stitches and techniques is essential.
At EMBpunch, we digitize not just designs but decades of tradition. Let us help you bring your hand embroidery ideas into the digital age.