If you’ve ever dabbled in online embroidery digitizing services, maybe on a sleek Brother embroidery machine or your mom’s trusty Babylock, you’ve probably stumbled across PES files. They’re everywhere. These tiny digital blueprints decide whether your floral PES design stitches out beautifully or whether it unravels into a chaotic mess of threads. Honestly, PES files are a bit like road maps: they’ll get you there, but only if you can actually read them.
And why should you care? Because without PES embroidery files, your machine doesn’t know what to do, it’s like asking a GPS for directions without entering the destination. But if you take the help of professional embroidery digitizing services, you can lessen all the burden.
Common PES File Problems (and how to fix them without losing your mind)
1. PES File Extension Errors
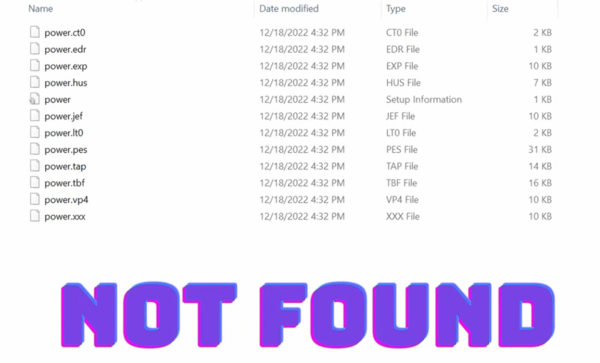
The issue: Your embroidery software or machine refuses to open the file. It shows “File not recognised.” Panic sets in. Usually, it’s because the extension was renamed incorrectly (like “design.pesx”) or because you tried opening it in software that doesn’t support PES embroidery format.
Solution:
-
Always make sure the file ends with “.pes”, not “.pesx,” “.exp,” or “.dst.”
-
Export directly from your digitizing program into PES format.
-
Use trusted software like Wilcom, Embrilliance, or PE-Design for PES file troubleshooting.
2. Hoop Size Problems in PES Files
The issue: You download a free PES design for a 6x10 hoop but your Brother machine only allows 4x4. The result? The file either won’t open, or the design gets cropped like a bad haircut.
Solution:
-
Double-check your machine’s hoop dimensions before loading designs.
-
Resize or split PES files into sections using embroidery digitizing software.
-
Remember: enlarging beyond 20% usually ruins stitch density.
3. PES File Version Compatibility
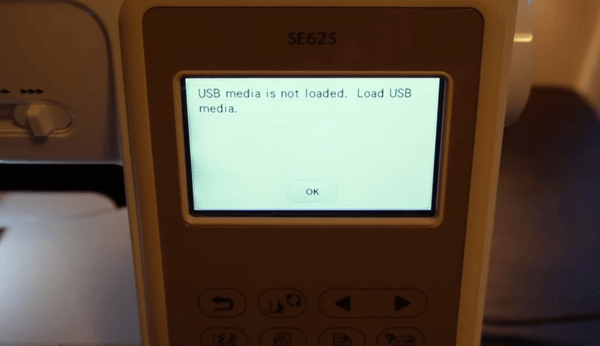
The issue: PES comes in versions. A design created in a new software (say PES version 10) might not load in an older embroidery machine that only supports version 6. It’s like trying to play a Blu-ray disc in a DVD player.
Solution:
-
Export PES in an older version when saving.
-
Update your machine’s firmware to improve PES file compatibility.
-
Test stitch-outs on scrap fabric before the real project.
4. Thread Colour Mismatches in PES Files
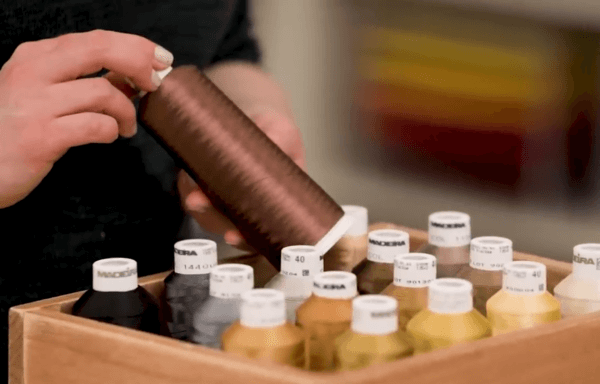
The issue: You load your PES embroidery file and the rose that looked red in preview comes out brown, or worse, neon orange. This happens because thread colour charts differ across brands and machines (Brother, Bernina, Madeira, etc.).
Solution:
-
Re-map colours manually in your software to match the thread brand you actually use.
-
Cross-check thread numbers against a physical colour chart.
-
If buying PES embroidery designs online, ask for a thread conversion chart.
5. Missing Stitches or Gaps in PES Embroidery Designs
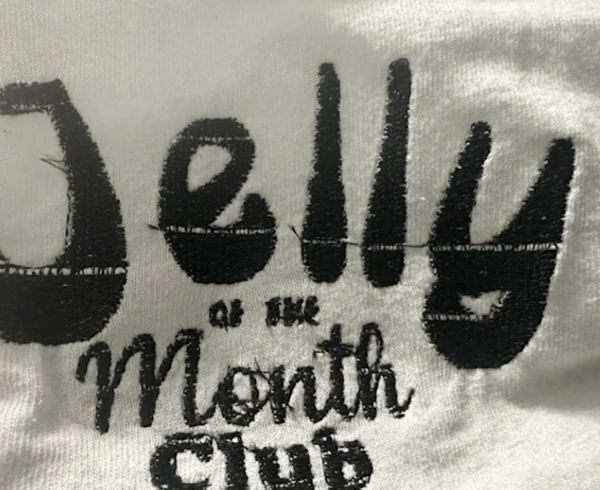
The issue: Your PES design looks flawless on screen but stitches with ugly gaps, uneven density, or broken fills. Usually this happens when resizing a PES file without recalculating stitches, or when the original digitizing wasn’t up to par.
Solution:
-
Don’t resize more than 10–20%.
-
Use software that auto-adjusts stitch density during resizing.
-
If you keep facing this, consult a professional digitizer for a clean file.
6. Corrupted PES Files (the worst-case scenario)
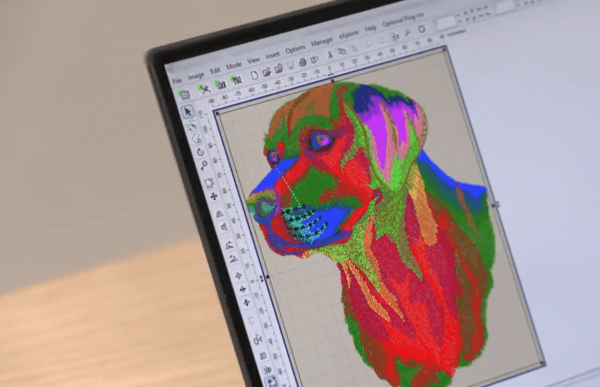
The issue: You download a PES embroidery file and it just won’t open, or worse, crashes your software. The file likely got corrupted during download, USB transfer, or improper saving.
Solution:
-
Re-download from a trusted embroidery design marketplace.
-
Keep backup copies of your files (seriously, always).
-
Ask the digitizer for a fresh PES version if possible.
A Slightly Technical Overview (minus the jargon overload)
So, what exactly is a PES file format? Think of it as a set of coded instructions. It tells your embroidery machine: move left, drop a stitch, change thread, jump here, trim there. Not glamorous, but crucial.
Inside every PES embroidery file you’ll find:
-
Stitch data (coordinates that act like an invisible map).
-
Thread colour changes (though these can be tricky, more on that later).
-
Hoop size details (your “playing field”).
-
Machine commands like trims or stops.
To be honest, peeking into PES file code looks a lot like scrolling raw HTML, it makes sense to the machine, but to us humans, it’s gibberish.
The Bottom Line (a little pep talk)
Embroidery isn’t just about thread and fabric, it’s closer to a strange dialogue between patience and stubbornness. And then you stumble into PES file errors. Oh, those little digital gremlins.
They sneak up on you like a random traffic jam on a Sunday morning (you weren’t even rushing, yet here you are stuck, honking internally). Sometimes they make you want to shut the machine off, toss the hoop aside, maybe even question why you ever thought digitising stitches into neat lines of art would be relaxing. But, here’s the odd truth, they also sharpen you. Like, painfully sharpen you.
The irony? Those glitches, the “file cannot be read” messages, or a hoop size mismatch, they don’t just block the road, they build detours. And on those detours, you end up learning tiny things you wouldn’t otherwise notice.
For example, the way a PES file is basically a map, coordinates and stitch commands, a digital compass of sorts, that your embroidery machine interprets like a GPS. If the GPS goes haywire, do you stop travelling? No, you reroute. Same thing here.
And honestly, that’s the takeaway: these hiccups are not disasters, they’re disguised tutors. PES file troubleshooting isn’t glamorous, no one brags about it on Instagram, but it’s a rite of passage.
Don’t shy away from the trial-and-error, it’s clunky, messy, sometimes boring, but each failed attempt is kind of like a rehearsal for your future wins.
Every so-called “embroidery master”? They’ve all wrestled with broken PES files, mismatched thread counts, or mysterious version compatibility issues. Trust me, no one got it smooth the first time. They clawed through the same digital chaos, probably muttering words you wouldn’t want embroidered on a pillow.
So, the bottom line (or maybe not so much a bottom line as a crooked underline): embrace the potholes. They’re annoying, yes, but they teach you to drive better. Keep experimenting, keep learning, and maybe, just maybe, you’ll start to see those PES errors not as enemies, but as reluctant allies in your journey.
Would you like me to expand this into a full “closing section” for your blog that loops back to Embpunch, like an invitation for readers who feel stuck to reach out for professional digitising help, or should I keep this piece raw and reflective?
What Does PES File Represent In Embroidery
If you’ve ever dipped your toes (or, well, your needle) into the world of machine embroidery, you’ve probably come across this mysterious little file extension: PES file.
It sounds techy, like some hidden NASA code, but in reality, PES is just the embroidery industry’s way of saying, “Hey, this is the digital blueprint your embroidery machine needs to stitch your design.”
And trust me, without it, your shiny Brother or Babylock machine might as well be a very expensive paperweight.
Now, here’s the weird part. PES files are both simple and maddeningly complex. Simple because they’re essentially just instructions, “stitch here, change colour there”, but complex because a small error (say, the wrong version, hoop mismatch, or format hiccup) can throw the entire process into chaos. Like forgetting your Netflix password after a long day.
The stakes feel higher, though, because you’ve got fabric, thread, and time on the line.
How PES Files Actually Work (Sort of Like a Recipe, But With Thread)
Think of a PES file as the recipe card for your embroidery project. Instead of sugar, flour, or yeast, the PES format tells the embroidery machine about stitches, colours, and where to move the needle. It’s written in a special “language” that only embroidery software and compatible machines understand.
-
Purpose? To translate a creative idea (your image, logo, or doodle) into a physical embroidery design that machines can execute flawlessly, or almost flawlessly.
-
How? By breaking down the image into step-by-step stitch commands.
Investigating the PES File Issue
Here’s where things unravel. A lot of beginners, and even seasoned embroidery fans, hit common PES file problems that feel impossible at first glance. Spoiler: they’re not. Most issues have simple fixes if you know where to look.
Check the Embroidery File Format
Sometimes, the PES file just won’t load. You click, drag, scream, and nothing. Why? Well, maybe you’ve got the wrong format. Embroidery machines are territorial; a Brother PES file won’t always play nicely with Janome (which loves JEF), or Bernina (DST).
Solution? Double-check your machine’s manual (yes, the one collecting dust in a drawer) or use embroidery conversion software to turn your PES into the right extension.
Check the Ring Size (Hoop Size Mistakes)
This one stings because it feels unfair. You finally get the design in, only for the machine to scream error: Hoop size mismatch. Basically, your design is too big, or sometimes too small, for the hoop you selected.
Why it happens: The PES file was digitized for a certain hoop dimension, and you’re trying to squeeze it into another.
Fix? Resize the design with digitizing software (Wilcom, Hatch, or even some free tools). Just don’t go wild; scaling a PES file too much can distort stitches. Small tweaks = safe. Giant leaps = messy.
Variant Issues (Version Compatibility)
Here’s one that really trips people: PES files actually come in different versions. A newer embroidery machine might read older PES files fine, but the reverse? Not always. If your machine is stuck in 2005, don’t expect it to handle the 2024 PES file version without a hiccup.
Why it happens: Software updates. Every few years, manufacturers tweak the PES format.
Solution: Export (or re-save) your design in an older version using embroidery software. It’s like saving a Word doc as a .docx or .doc, compatibility mode saves the day.
String Showing Issues (Thread Showing Problems)
This one is sneaky. You’ve loaded the PES file, hoop’s fine, format works, version checks out. But when you stitch, the thread looks messy, strings showing through, weird gaps, colours not lining up.
Why? Often, it’s a digitizing problem. Whoever created the PES file didn’t adjust underlay stitches, densities, or pull compensation correctly. The file isn’t “wrong,” per se; it’s just poorly digitized.
How to fix: Re-digitize the file or ask a professional digitizer (yes, like us at Embpunch) to clean it up. Sometimes just tweaking the stitch density or underlay in editing software can solve it. Other times, it’s better to start fresh.
Frequently Asked Questions (FAQs)
How to fix PES embroidery file colour mismatch?
PES files and colour mismatches, don’t you just love the little chaos they bring into your perfectly curated embroidery plans? It’s like expecting a serene sunset and getting a neon billboard instead. Seriously, even the most meticulous designers have cursed at their screens over this. Here’s the lowdown, but brace yourself, it’s going to be a mix of the practical, the messy, and the slightly philosophical.
1. Peek into Your Design Software Palette
So, first things first. Open that PES file in whatever software you’re using, Embird, Wilcom, Hatch, Brother PE-Design… it’s all basically a buffet of technical wizardry, but with its quirks. Check the colours, really check them, not just glance. Sometimes the software “helps” by auto-matching, and it’s like giving your embroidery a mood swing. Manual assignment is your friend here. Don’t rely on magic.
2. Thread Brands-The Silent Culprit
Here’s the sneaky bit: PES files often assume a thread brand. Madeira? Isacord? Brother? And then you toss it into a machine that’s brand-loyal in its own stubborn way, and boom, neon green where there should’ve been forest. Solution: remap. Convert your file’s palette to the threads you actually have. It’s a bit like translating Shakespeare into emojis, you lose something, but at least it works.
3. Colour Mapping: Tweak, Adjust, Repeat
Dive into the colour mapping or thread chart section of your software. Sometimes you’ll find a “closest match” that’s barely close. Replace, preview, squint at the screen, take a deep breath. Rinse and repeat. Bonus tip: squinting can actually help, psychologically. And hey, software previews aren’t reality, they’re more like Instagram filters for embroidery.
4. Machine Settings. Yes, Those Too
Firmware updates, settings tweaks, brand preferences… sounds boring but trust me, it matters. Your machine might be holding a grudge against certain PES codes (machines are dramatic like that). Set it to match the file’s intended brand if possible, or risk a colour rebellion mid-stitch.
5. Test Stitch. Your Safety Net
Never, ever just dive into a full design. Do a small test patch, like a rehearsal dinner before the wedding, but with threads and fabric instead of champagne. Compare. Adjust. Cry silently if it’s still wrong. But then laugh because, well, life is short and embroidery is patience in disguise.
6. File Conversion. Sometimes the Only Fix
Occasionally, the PES file itself is… corrupted? Or just poorly saved? Re-saving or converting it can realign those rogue colour codes. Think of it like giving the file a cup of coffee and telling it to behave, sometimes it works.
Extra Hack: Keep a thread swatch sheet of your machine’s palette. Physically. Hold it up, compare colours like a detective inspecting evidence under harsh light. Helps when the software palette is having an existential crisis.
Colour mismatches in embroidery are annoying, yes, but they’re also oddly poetic. It’s the tension, the unpredictability… a reminder that perfection is an illusion, like expecting Starbucks to get your caramel macchiato temperature just right every single time.
Pes Embroidery File Compatibility Issues With The Brother Machine
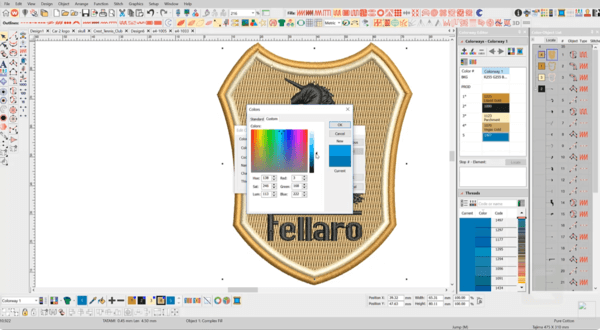
PES files and Brother machines, that’s a love-hate saga if there ever was one. You think you’re ready to stitch a masterpiece, and then… the file refuses to play nice. Let’s break down why compatibility issues happen and how to tackle them (with a dash of real-world chaos because, why not).
1. PES Versions – Not All Are Equal
Brother machines love PES files, yes, but only certain versions. A PES file saved in, say, Wilcom 2019 or Hatch 2021 might have subtle differences that Brother interprets as “error.” So, if your file suddenly says “cannot read file”, it’s likely a version mismatch.
Pro tip: Always save/export PES in the version your specific Brother machine expects. Check the manual, yes, that dusty thing in your drawer sometimes saves the day.
2. Thread Colours & Palette Confusion
PES files carry colour codes from specific brands (Isacord, Madeira, etc.). Brother machines have their default palettes, and sometimes they don’t translate perfectly. This can cause:
-
Wrong colours stitching
-
Colour shifts mid-design
-
“Missing thread” errors
Workaround: Use your software to remap the colours to Brother-compatible threads before stitching. Preview the software first, don’t trust the file blindly.
3. Complex Designs & Density Problems
Brother machines can choke on overly complex PES files, think too many stitches, overlapping satin fills, or heavy density. Result? Skipped stitches, tangling, or the machine refusing to read the file.
Tip:
-
Simplify the design slightly.
-
Reduce stitch density if your software allows.
-
Test on scrap fabric first.
4. Unsupported Features
Some PES files from high-end software include advanced features Brother might not fully support, like pull compensation, special stitch effects, or tiny trims. When this happens, Brother may:
-
Ignore certain effects
-
Show an error
-
Stitch unpredictably
Solution: Strip unsupported features or convert them into standard stitches before exporting.
5. File Corruption
Yes, sometimes it’s just bad luck. PES files can get corrupted during transfer (USB, SD card, or email). A corrupted file often triggers a “cannot read” error or stitches incorrectly.
Fix: Re-export from the original software, or try opening the file in another editor and re-saving it.
6. Machine Firmware
Brother machines need up-to-date firmware. Older firmware may struggle with newer PES formats or large files.
Pro tip: Check Brother’s website for updates. It’s tedious, but it can solve weird compatibility issues instantly.
Quick Reality Check
Compatibility issues aren’t always one thing; they’re usually a mix: version mismatch, palette confusion, high stitch count, unsupported effects, and sometimes sheer cosmic luck. Treat each PES file like a temperamental artist: approach carefully, test first, and never assume it will behave.
Brother PES file hoop size error fix
The dreaded Brother hoop size error, it’s one of those moments where you feel like your machine is judging you. Like seriously, you spent hours perfecting a PES file, every stitch aligned, colours sorted, and then, BAM!, “Hoop size error.” It’s the embroidery equivalent of stepping into a Starbucks drive-thru only to find they ran out of oat milk. Frustrating, unpredictable, and somehow inevitable.
1. Grasp What’s Happening
First, let’s set the scene. Brother machines aren’t wild free spirits, they have their hoop size limits (100x100 mm, 130x180 mm, 240x360 mm, and a few more depending on your model). If your PES file dares to be a millimeter larger than the hoop, the machine basically throws its mechanical hands up. It’s like trying to cram a sofa through a cat flap. Doesn’t matter how perfect the stitching is, it just refuses.
2. Measure, Measure, Measure
Open your PES file in Hatch, Wilcom, Embird, whatever floats your boat. Look at the design dimensions, width x height. Don’t just glance, actually stare at it. Compare it with your hoop’s size. Tiny discrepancies can trigger the error. Even a 1–2 mm overshoot is enough for your machine to go “nope.”
Side note: I once had a floral monogram design that was exactly on the limit, every time I tried, it whined like an old car. Shrinking it by just a millimeter magically fixed the rebellion.
3. Resize the Design, Carefully
If your design is too big, you have to resize, but gently. Don’t just squish it like a stress ball. Maintain stitch density, because too dense a design in a smaller hoop is a disaster waiting to happen: puckered fabric, snapped threads, and tears in your soul.
4. Hoop Settings on the Machine
Sometimes the issue isn’t the file, it’s the machine. Some Brother models let you select the actual hoop size, and if you’re off even slightly, it can trigger errors. If your design is bigger than the largest hoop available, tough luck, you either split it or redesign. Brutal, yes, but that’s life (and embroidery).
5. Splitting the Design
When a design is too big, most software (Embird, Hatch, Wilcom) lets you split it into multiple sections. It’s like slicing a giant cake into manageable pieces, but each slice must align perfectly. Misalignment, and your flower ends up looking like a Picasso experiment. Set your alignment points carefully; otherwise, chaos ensues.
6. Re-export the PES File
After resizing or splitting, re-export your PES file. Make sure it’s still Brother-compatible, because some software sneaks in funky metadata that can mess everything up.
7. Test Stitch
Always, always do a test stitch. Even a small one. It’s your safety net, your early warning system, your “oh thank god” moment. Check for distortions, alignment issues, puckering, weird stitch behaviour… basically, everything that could go wrong will. And if it does, well, at least you didn’t waste a whole hoop of expensive fabric.
Pro Tip: Keep a hoop size chart on hand. Not the IKEA kind, this is the Brother reality check. Knowing your hoop dimensions in millimeters prevents hours of frustration and caffeine-fuelled late-night muttering.
Honestly, hoop size errors are less about technology failing and more about a subtle dance between software, file, and machine. It’s like juggling three cats and expecting them to form a conga line, chaotic but somehow, with patience, it works.
